The server only understands the IP address and not the domain name. Whenever you type a domain name in the address field of the browser, you request through the DNS to know the IP address of the site/domain you are requesting. In short, the DNS server changes the domain name into the associated IP and gives you the result.
By default, you use the DNS server provided by your ISP. These servers aren’t generally good and may even block some websites/contents or slow your browsing speed. People prefer changing the DNS server on their devices to overcome such issues. In this article, we will guide you on how you can change the DNS server on Windows 10/11, macOS, Android, and other OS.
How to Change DNS Server on My Device?
Changing the DNS server of a particular device will only affect that particular device and not your internet connection. For instance, if you have a PC and a phone that is connected to the same network, and you decide to change the DNS server of the PC for faster browsing. Only the DNS server of the PC will be impacted, while you will have the same browsing experience on your phone.
The steps to change the DNS server can vary for different OS. Let’s go through how you can change the DNS server on Windows 10, Windows 11, macOS, Android, and other devices. Before continuing the steps mentioned below, ensure your device is connected to the network whose DNS you want to change.
Change DNS Server on macOS
If you have a Mac, you can follow the steps below to change the DNS server on it. Note that the steps we have listed are for the macOS Ventura and may differ for other versions.
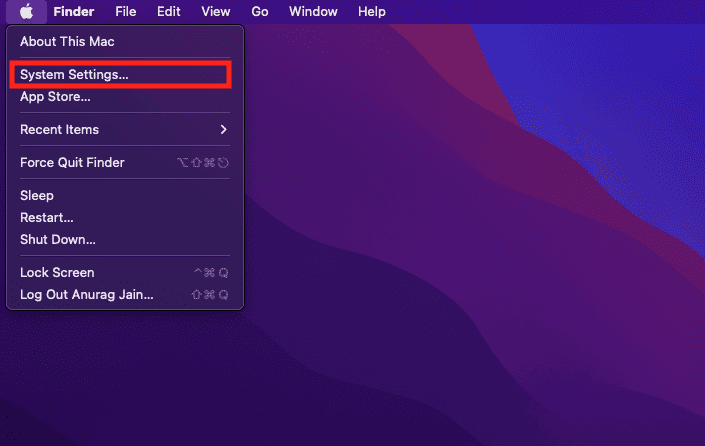
- Click on the Apple icon at the top left corner, and then from the menu, click on System Settings.
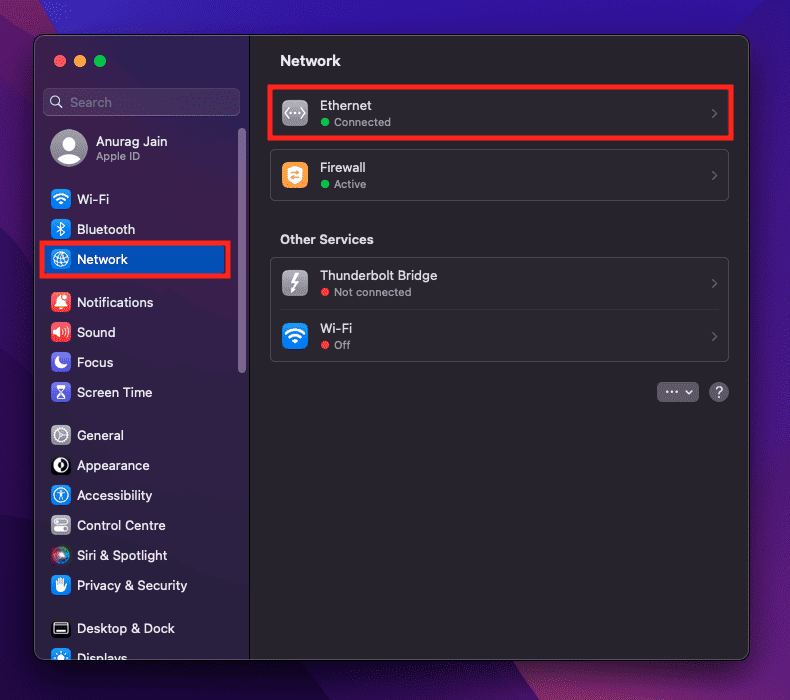
- On the left pane, click on the Network option.
- On the right side, click on your network service, i.e., Wi-Fi or Ethernet(if applicable).
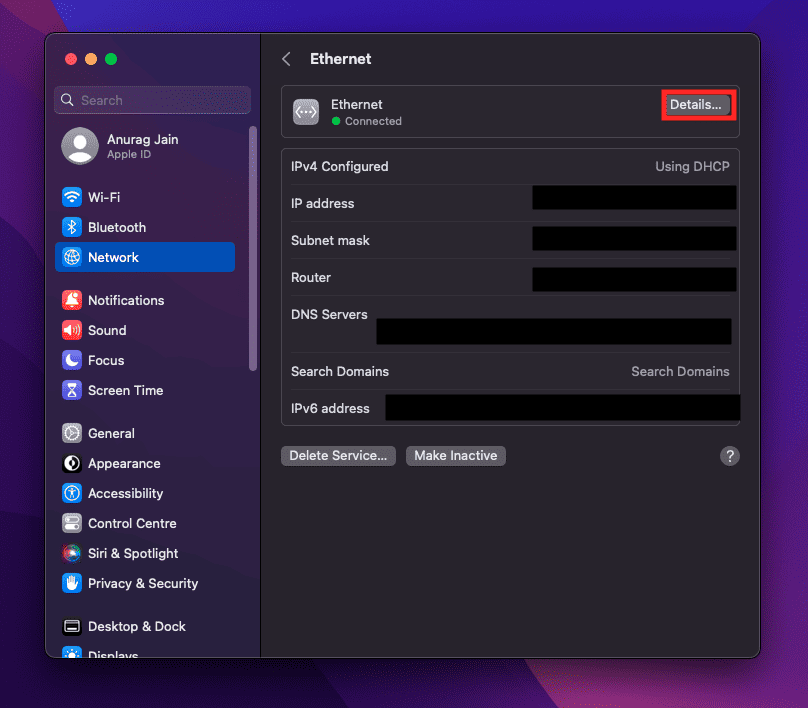
- Click on the Details button.
- Next, click on the DNS option.
- You will have to make changes under the DNS Servers section on the right side.
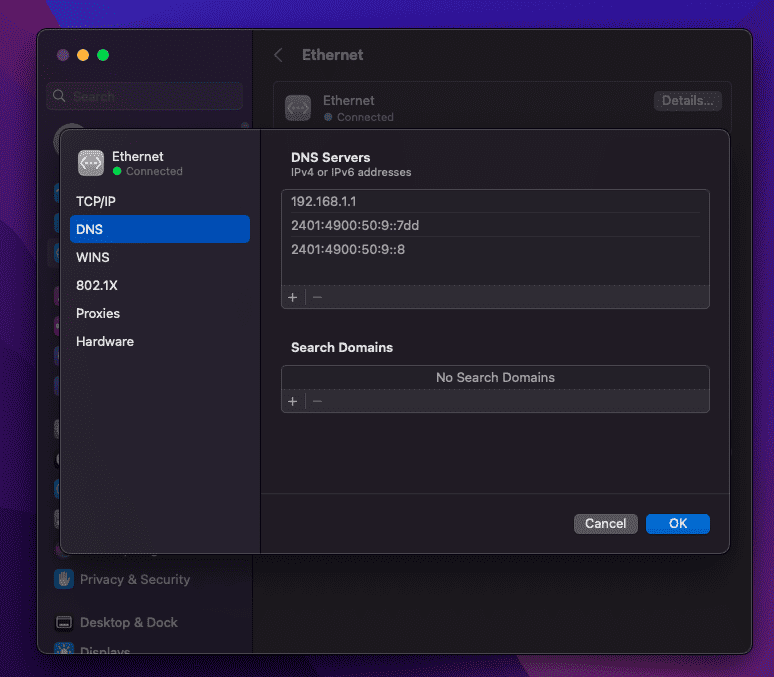
- Click on the + icon to add a DNS server. You will now be able to add IPv4 and IPv6 addresses.
- To remove the DNS server, select the server and then click on – icon. This will remove the DNS server.
- Once done, click on the OK button.
Change DNS Server on Windows 11
For Windows 11 users, they can follow the steps given below to change the DNS server on their device-
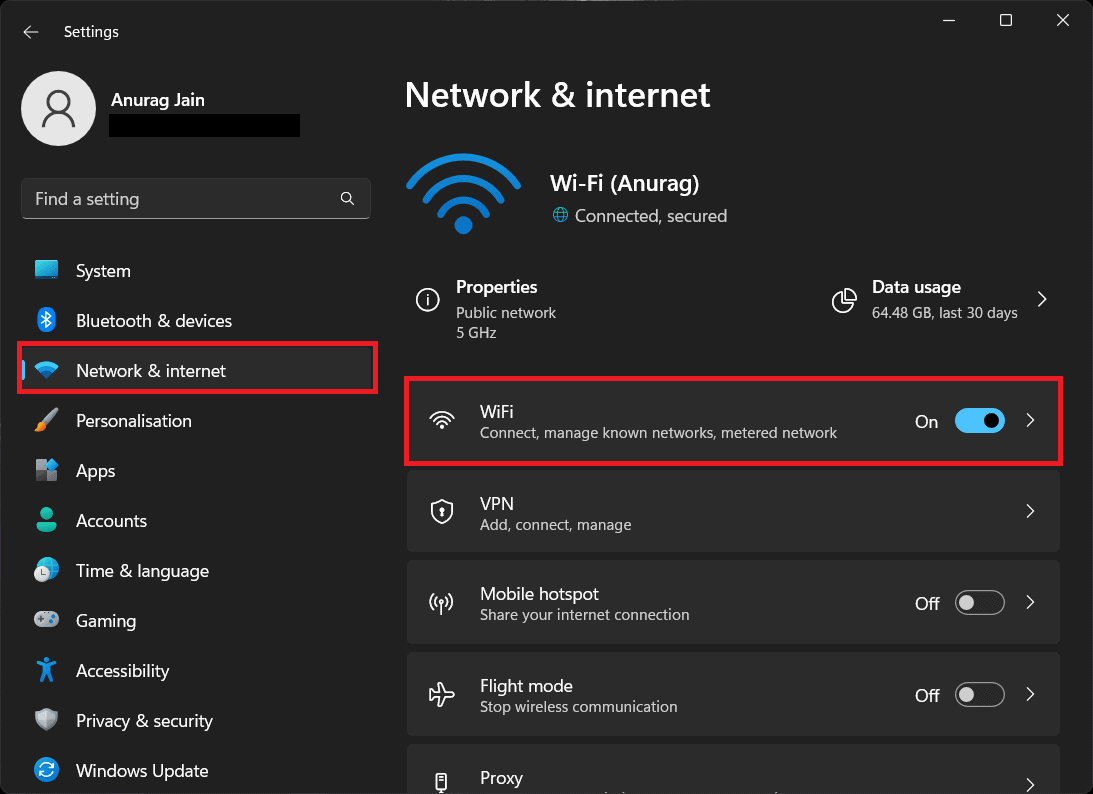
- Press the Windows + I key combo to open the Settings.
- Click on the Network & Internet tab on the left tab.
- Now, click on the Wi-Fi/Ethernet, depending on what type of network you are using.
- Click on the Hardware Properties option.
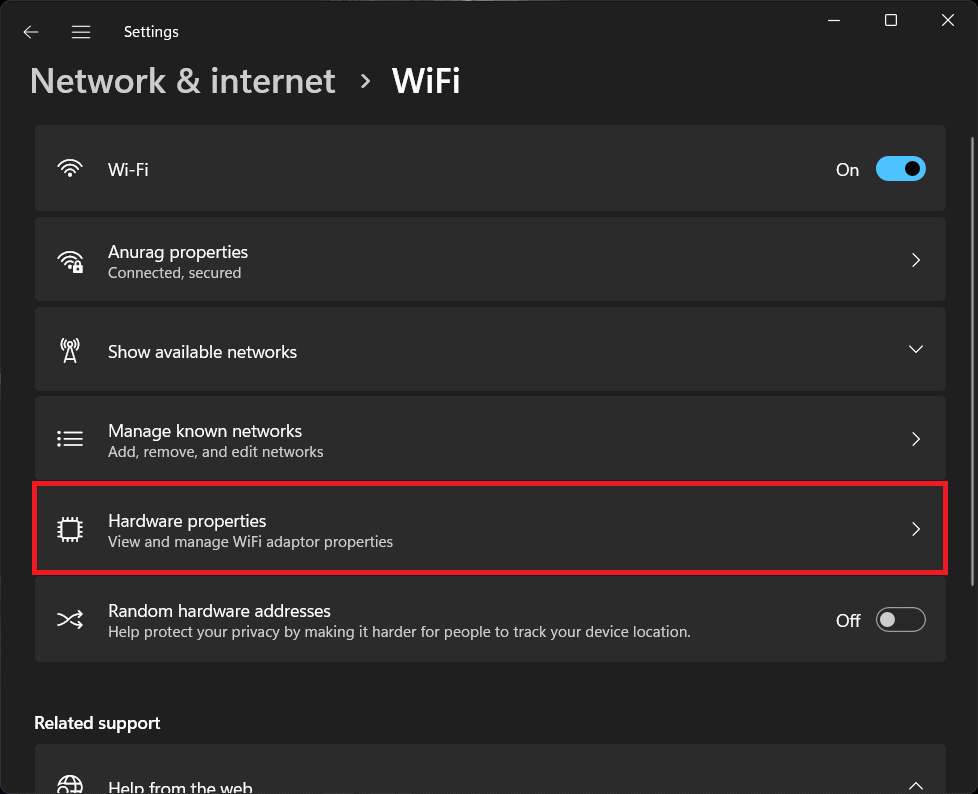
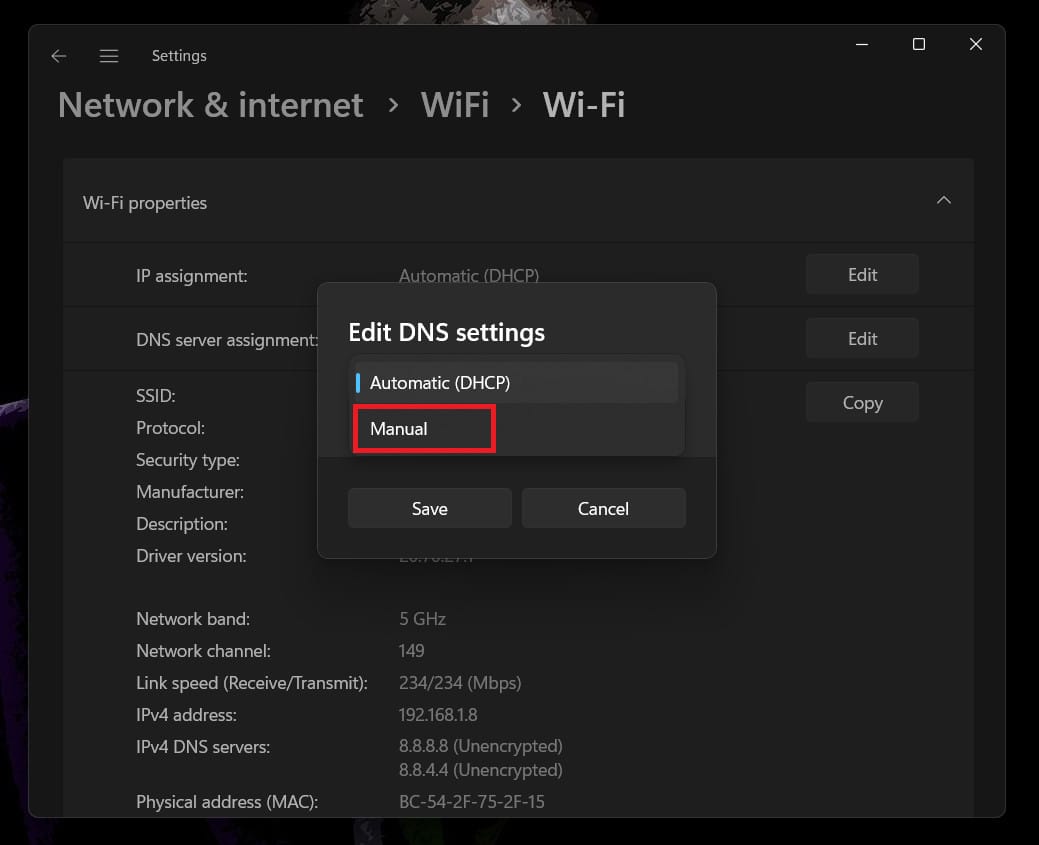
- Click on the Edit button next to the DNS Server Assignment.
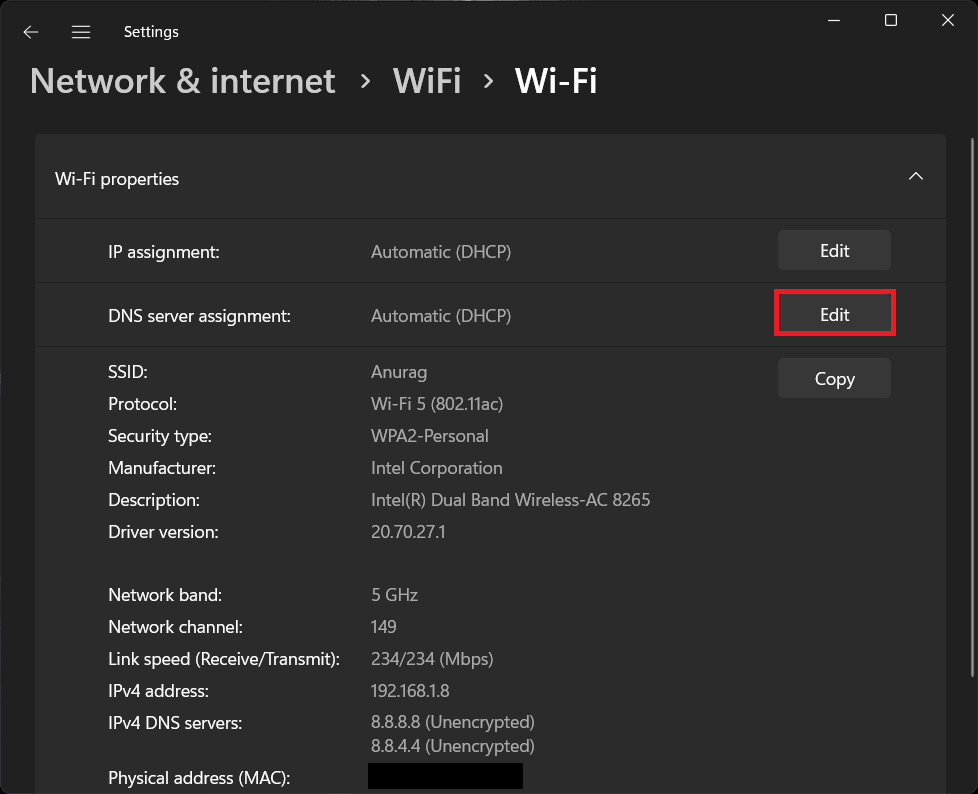
- Next, click on the drop-down menu at the top and select Manual.
- Turn on IPv4 and then add the preferred DNS and alternative DNS. This will add the IPv4 address.
- To add an IPv6 address, turn on the toggle under IPv6 and add preferred DNS and alternative DNS.
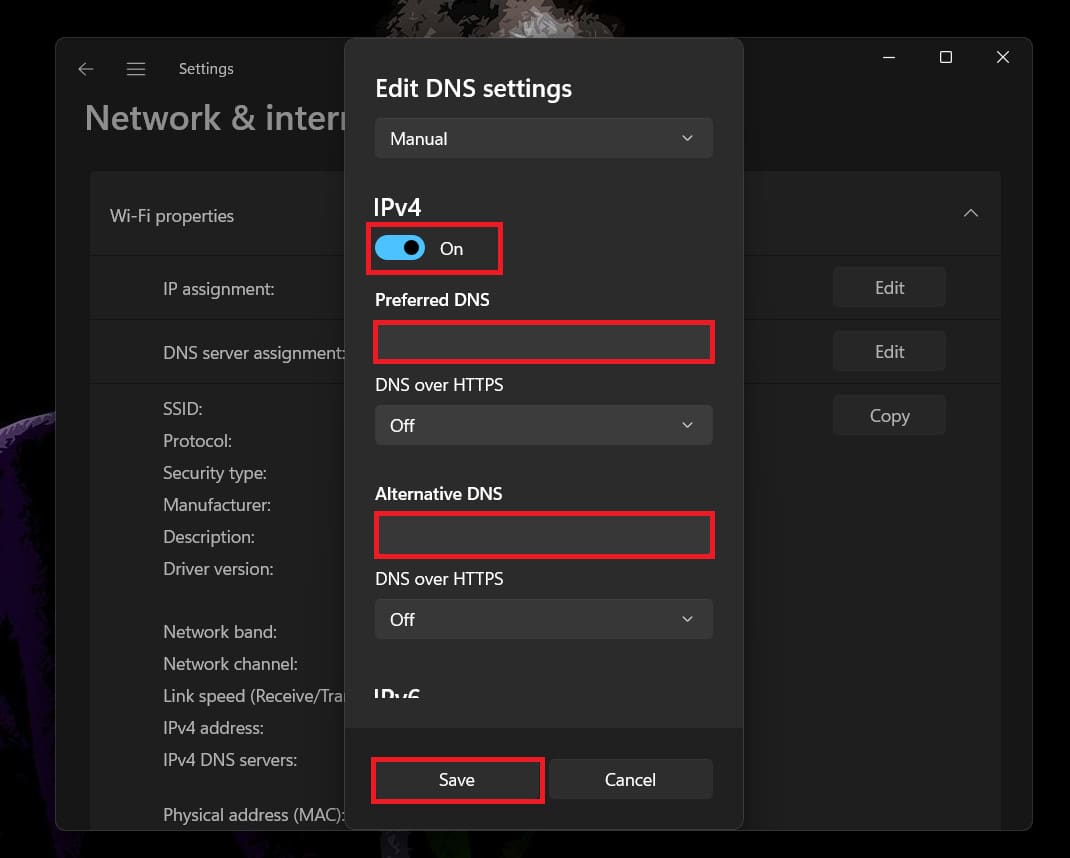
- Once done, click on the Save button to save the server.
Change DNS Server on Windows 10
If you have a PC with Windows 10 installed, then you can follow the steps given below to change DNS servers on it-
- Open the Start Menu by pressing the Windows key. In the Start Menu, type Control Panel and open it.
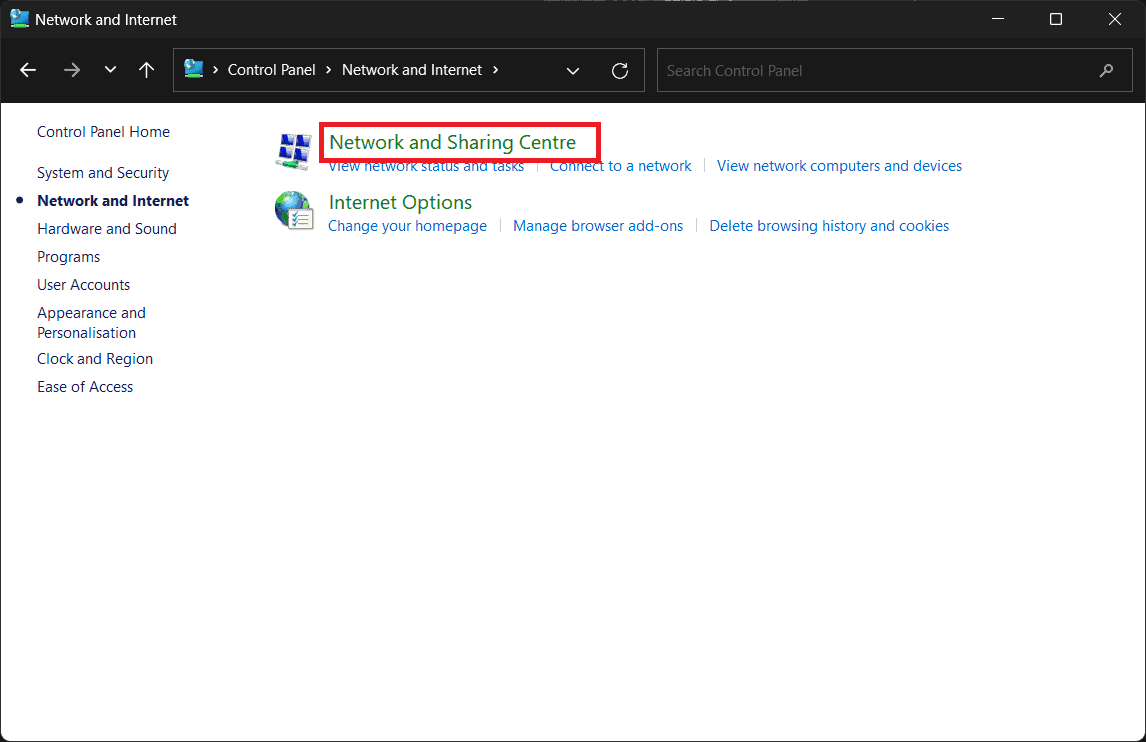
- Click on the Network and Internet option.

- Next, click on Network and Sharing Center.
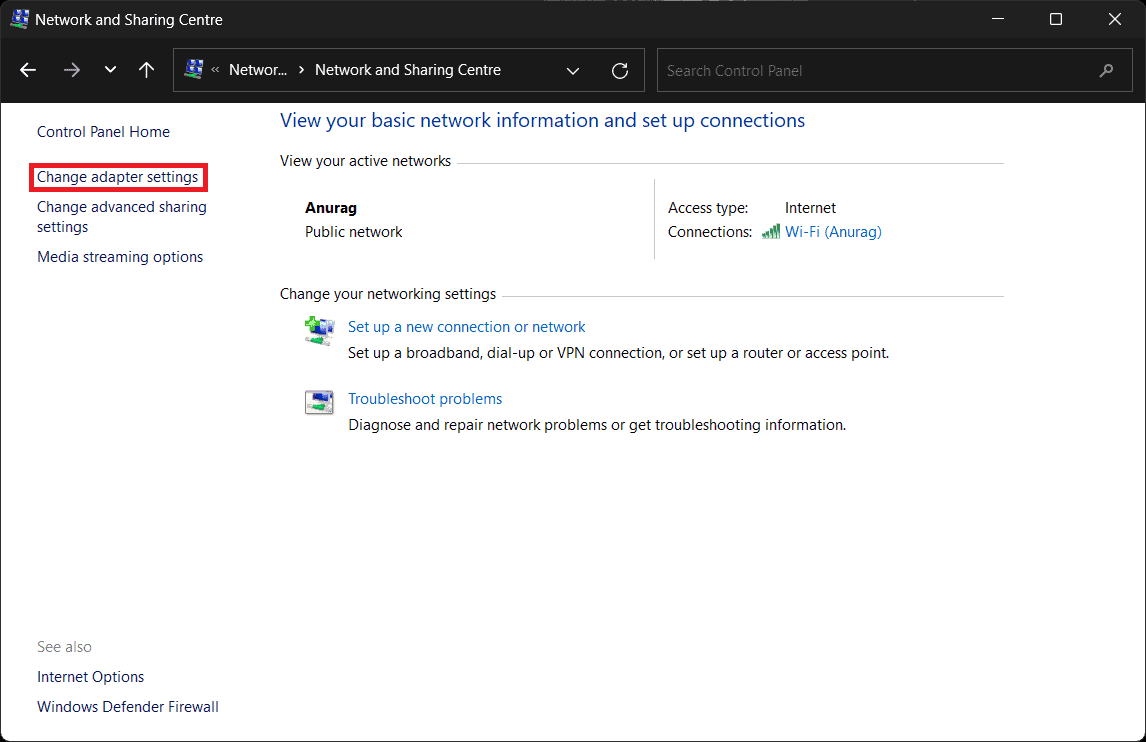
- On the left sidebar, click on the Change adapter settings option.
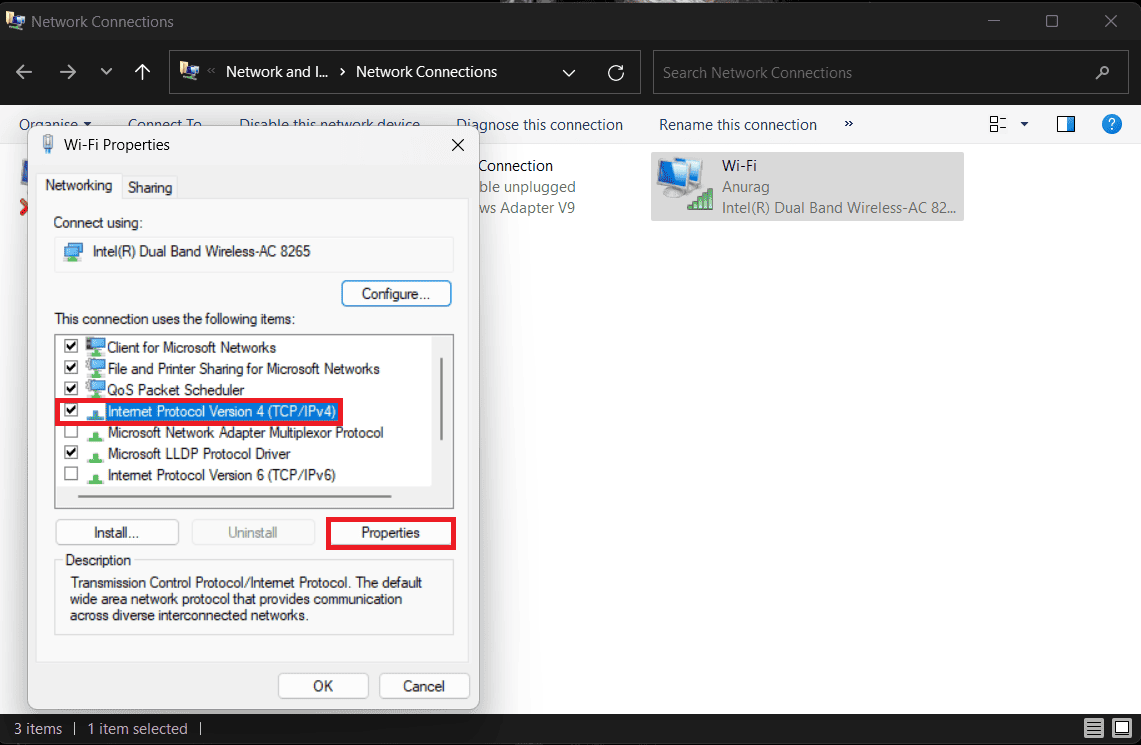
- You will see all the network connections on the next screen. Right-click on the network you are connected to and click on the Properties option.

- Next, select Internet Protocol Version 4 (TCP/IPv4) and then click on Properties to set the IPv4 address. To set an IPv6 address, select Internet Protocol Version 6 (TCP/IPv6) and click on Properties.
- Select the option saying Use the following DNS server addresses.
- Add the Preferred DNS Server and the Alternative DNS Server.
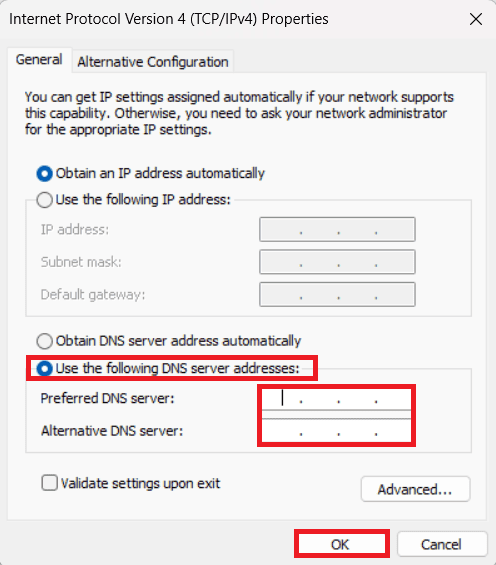
- Once done, click Apply and OK to save the changes.
Change DNS Server on Android
If you have an Android phone or tablet, then you can change the DNS server on it by following the steps given below-
For Mobile Data
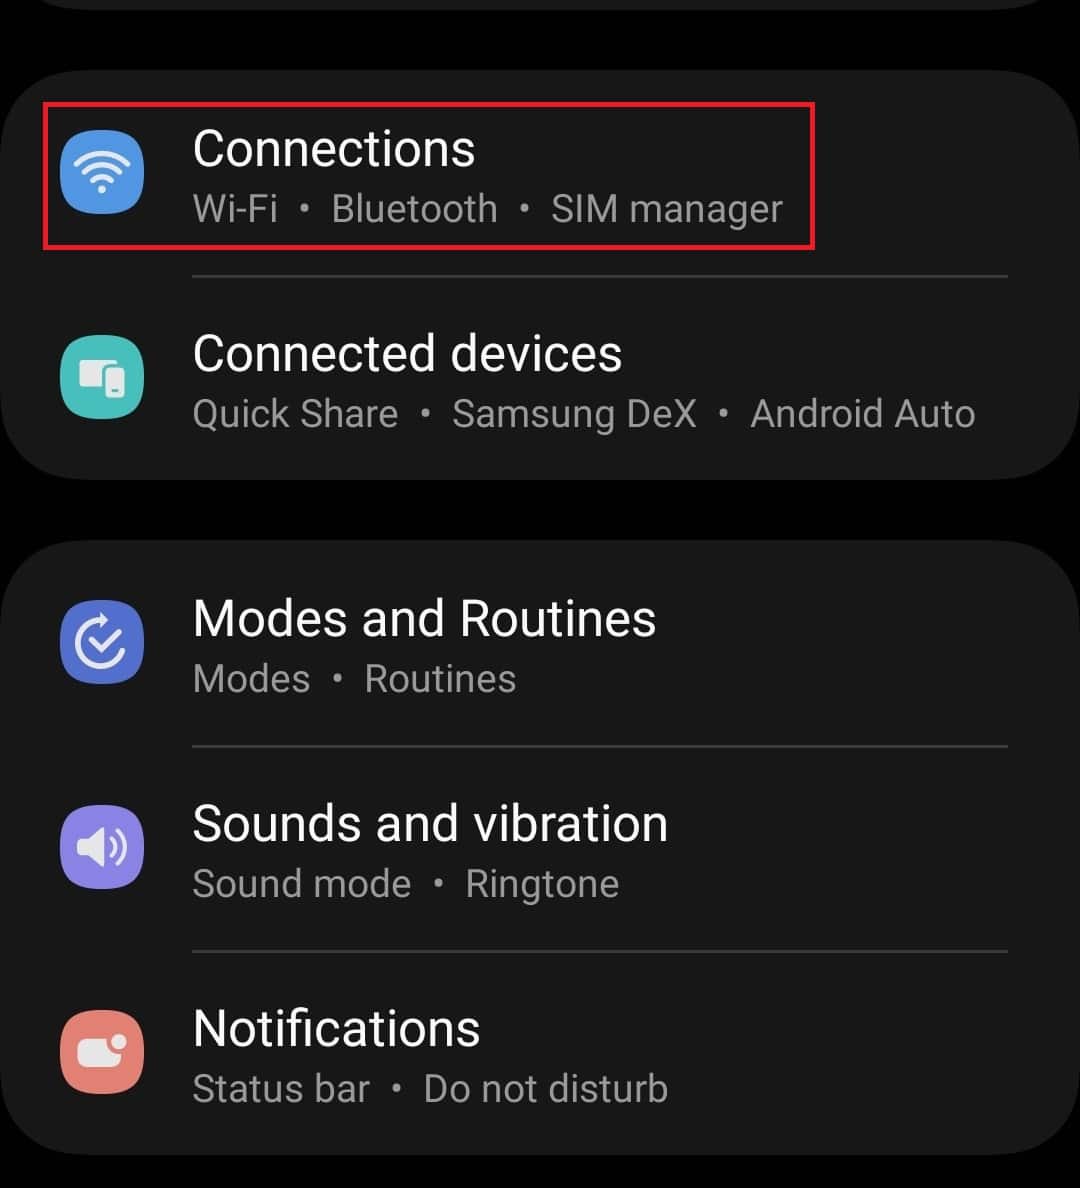
- Open the Settings of your Android phone/tablet.
- Now, tap on the Connections option.
- Here, tap on More Connection Settings.
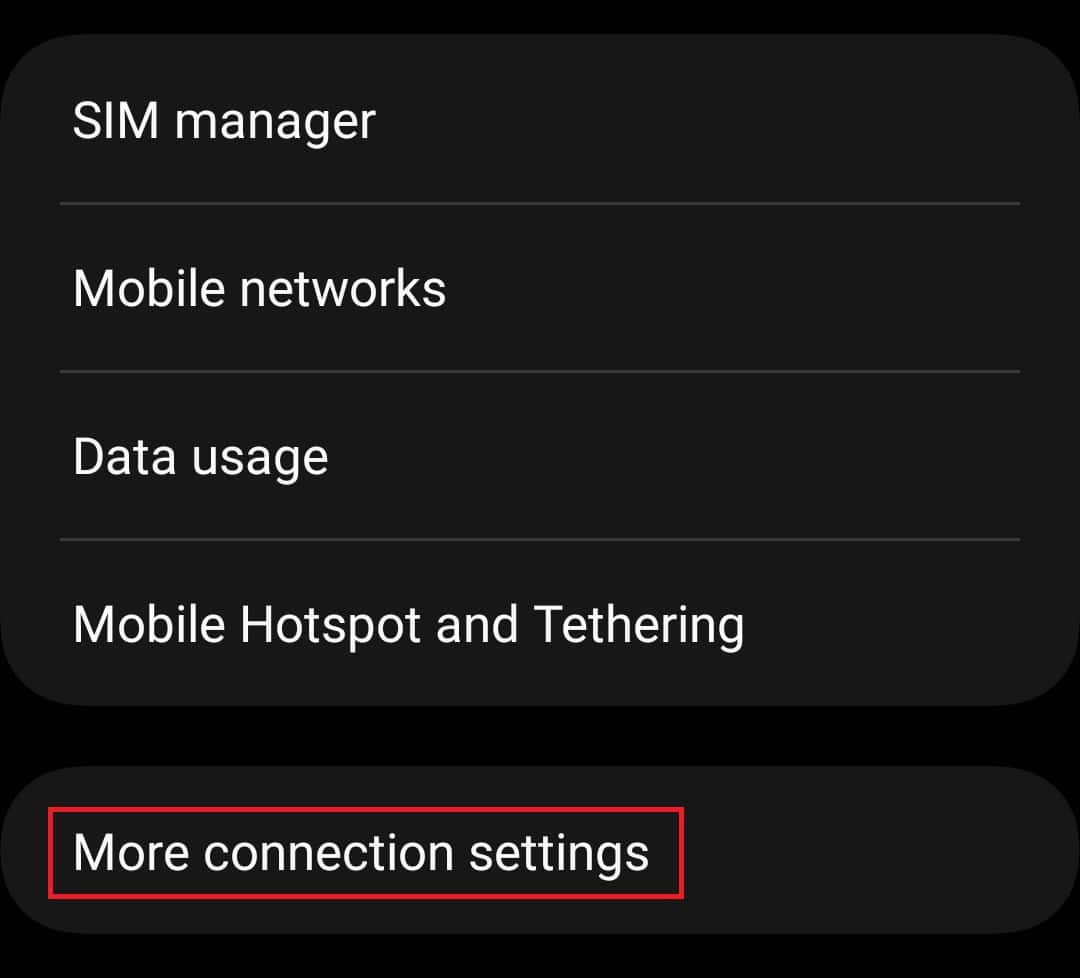
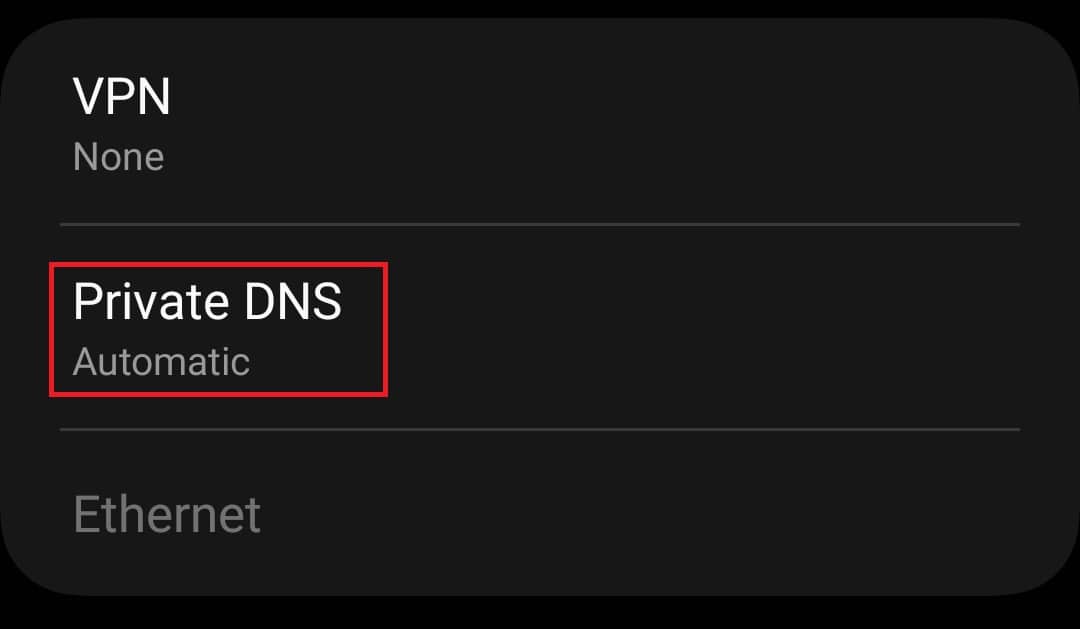
- Next, tap on the Private DNS option.
- From the options, select Private DNS Provider Hostname.
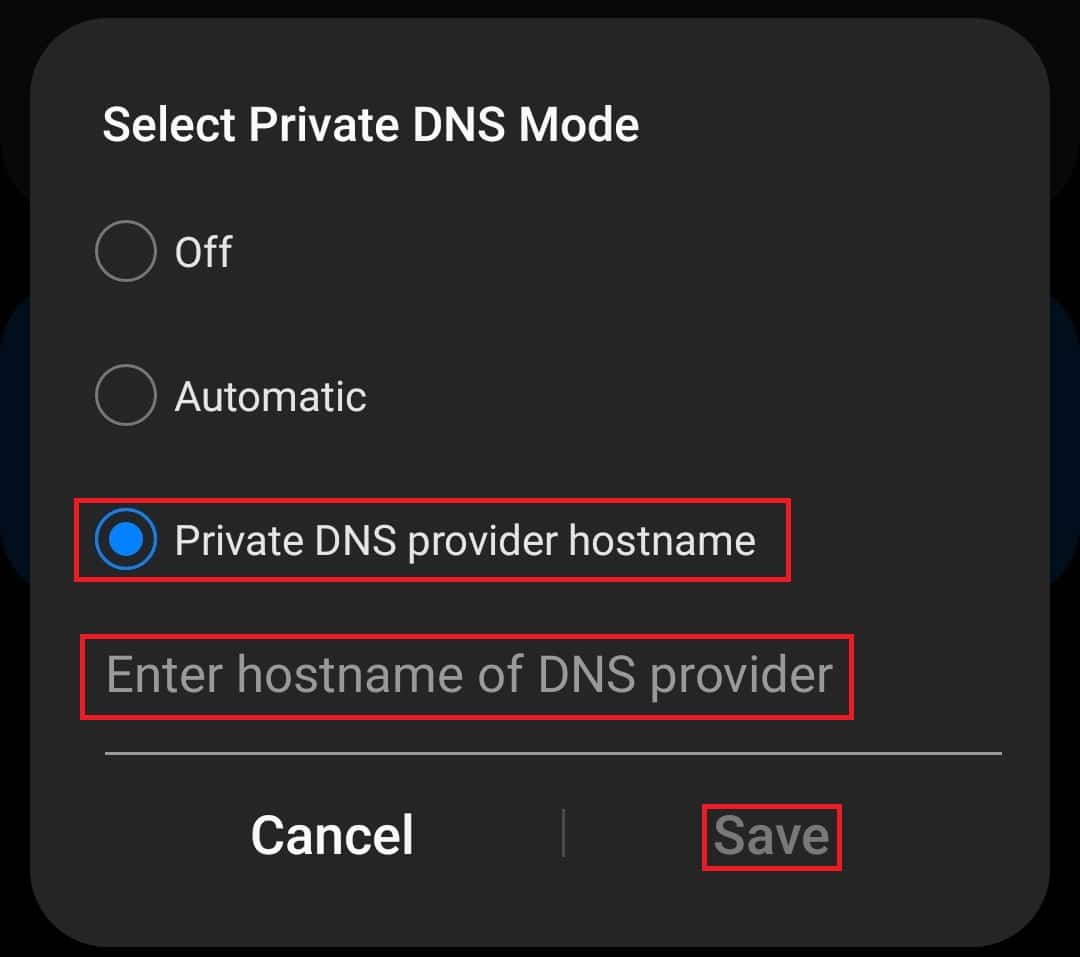
- Type the hostname of the DNS provider and tap on Save.
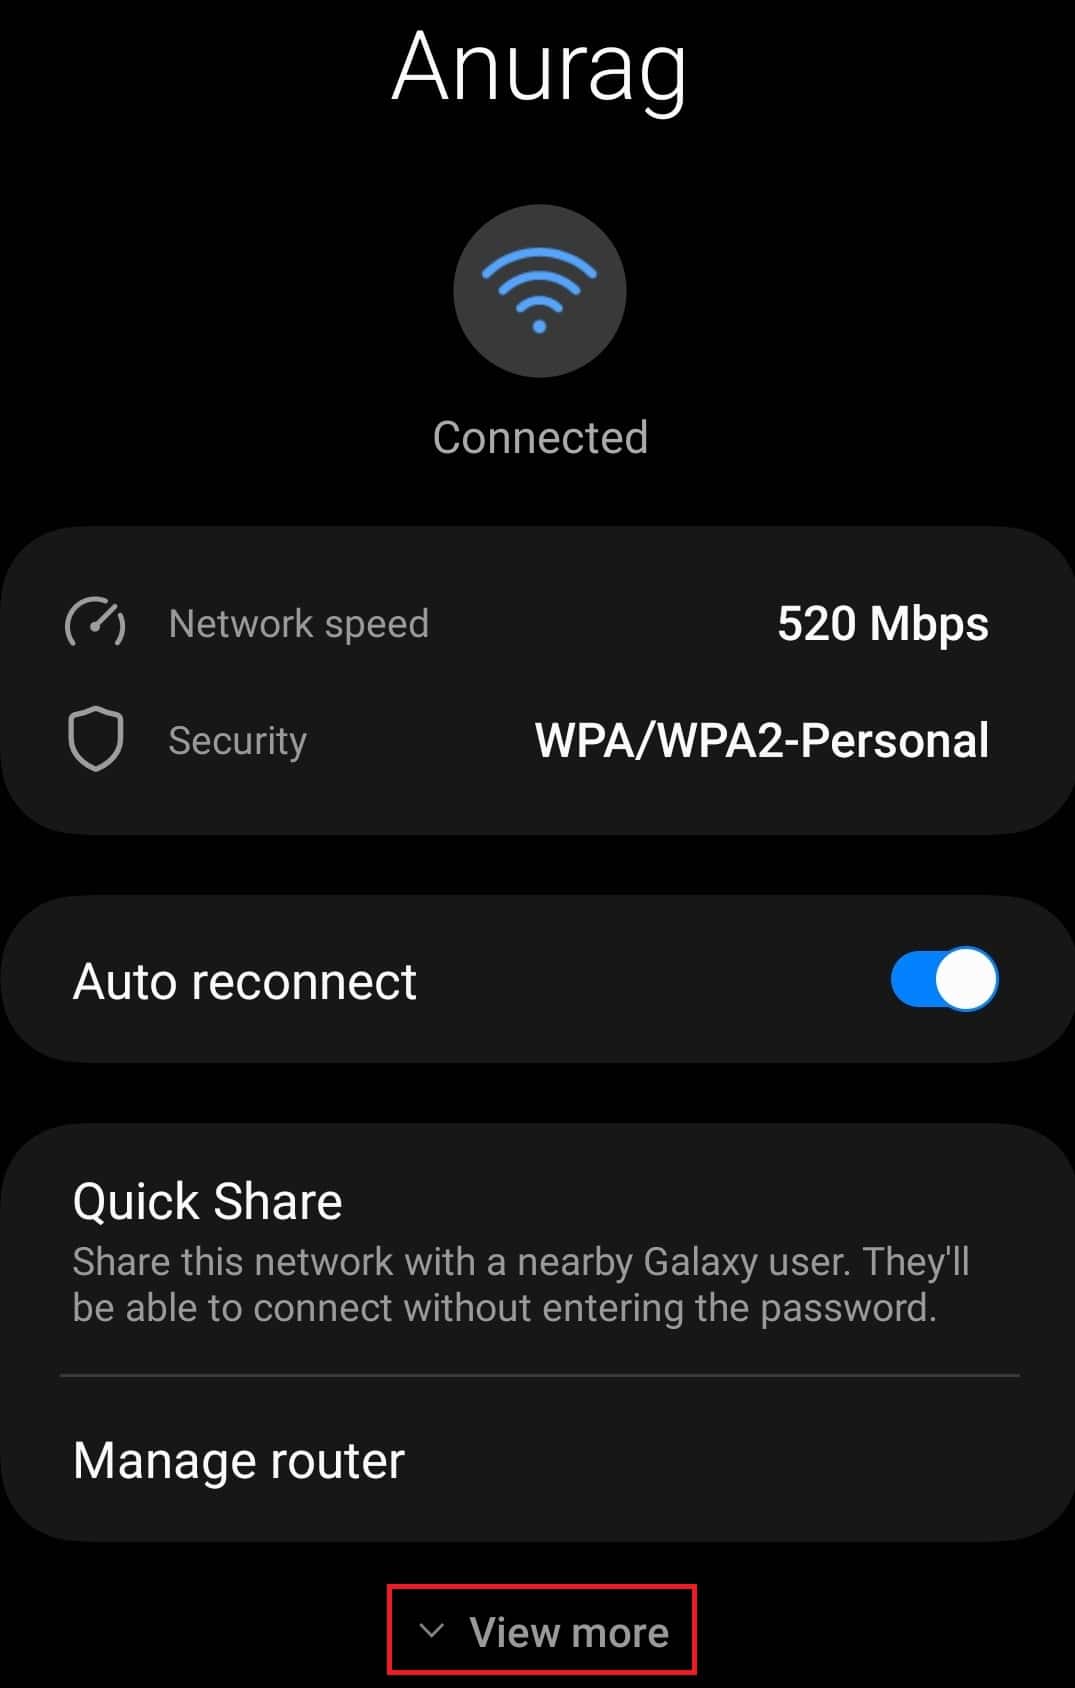
For Wi-Fi
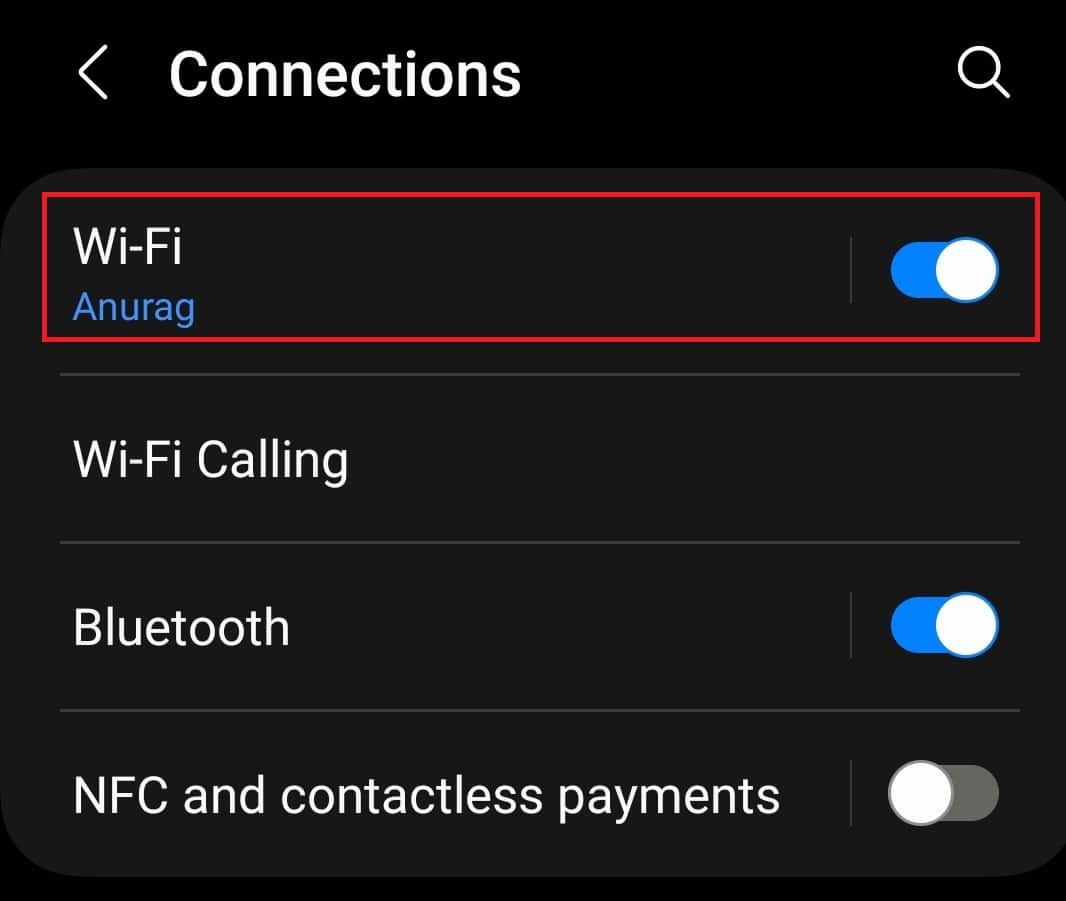
- Head to the Settings>Connections.
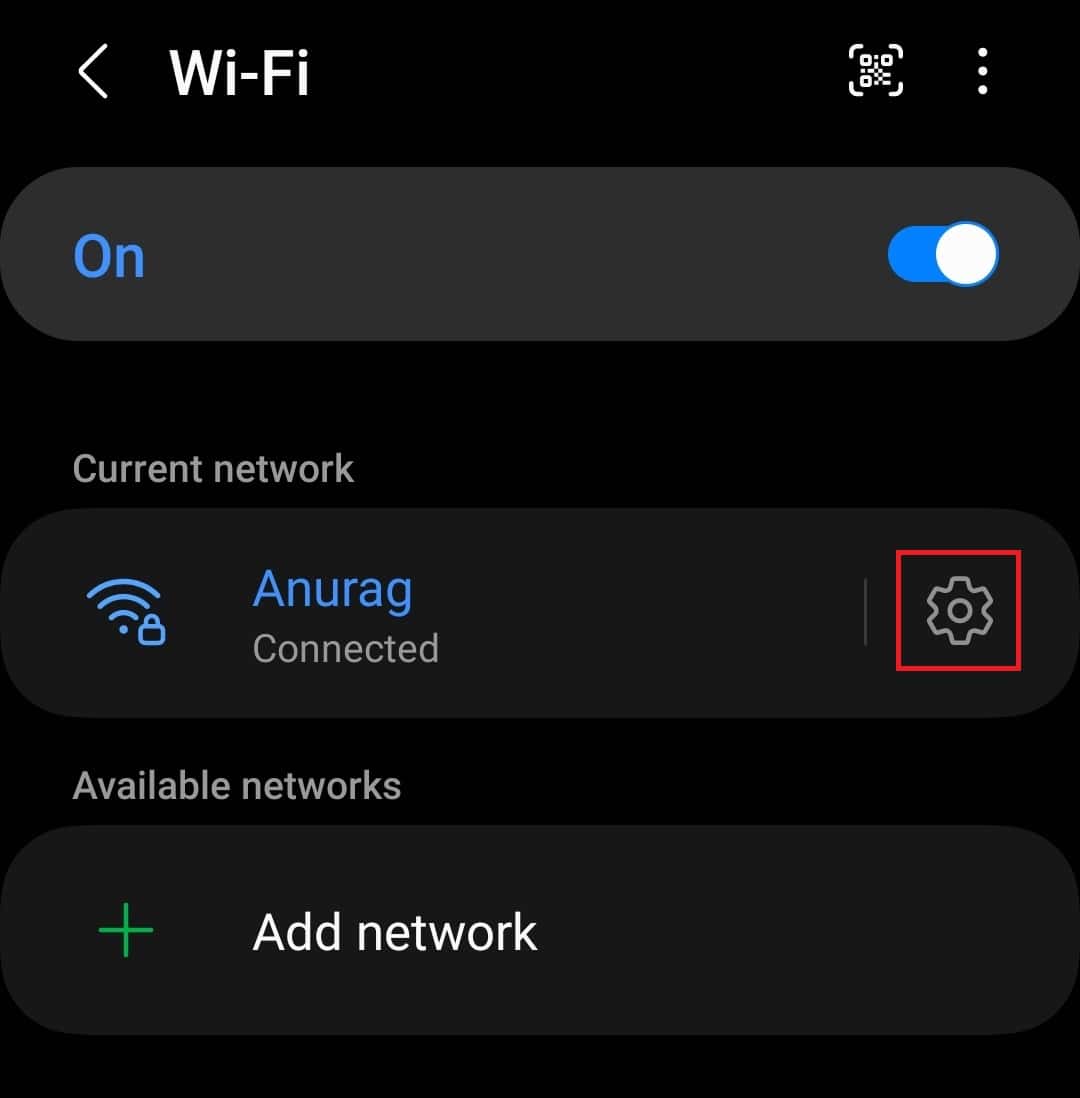
- Tap on the Wi-Fi option.
- Next, tap on the Gear icon next to the Wi-Fi network.
- Tap on View More at the bottom of the screen.
- Tap on the IP Settings option.
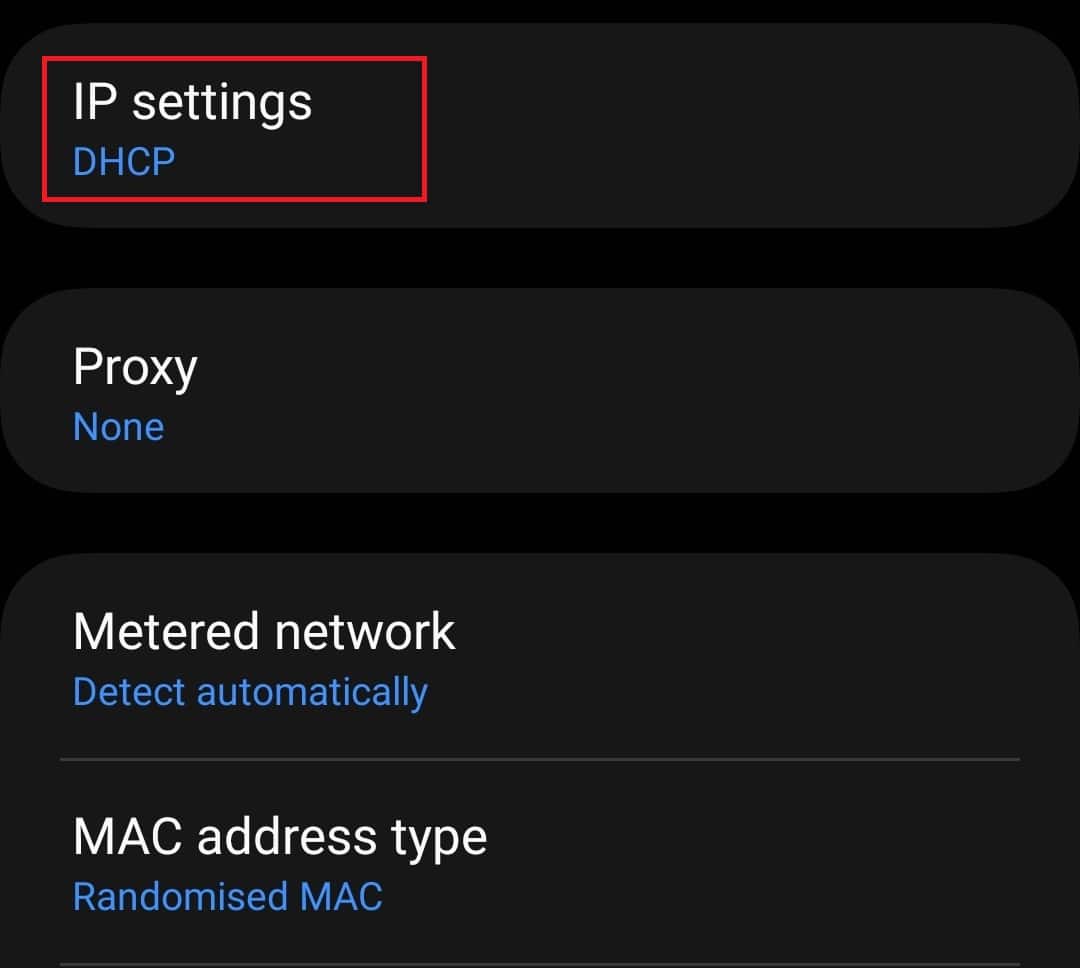
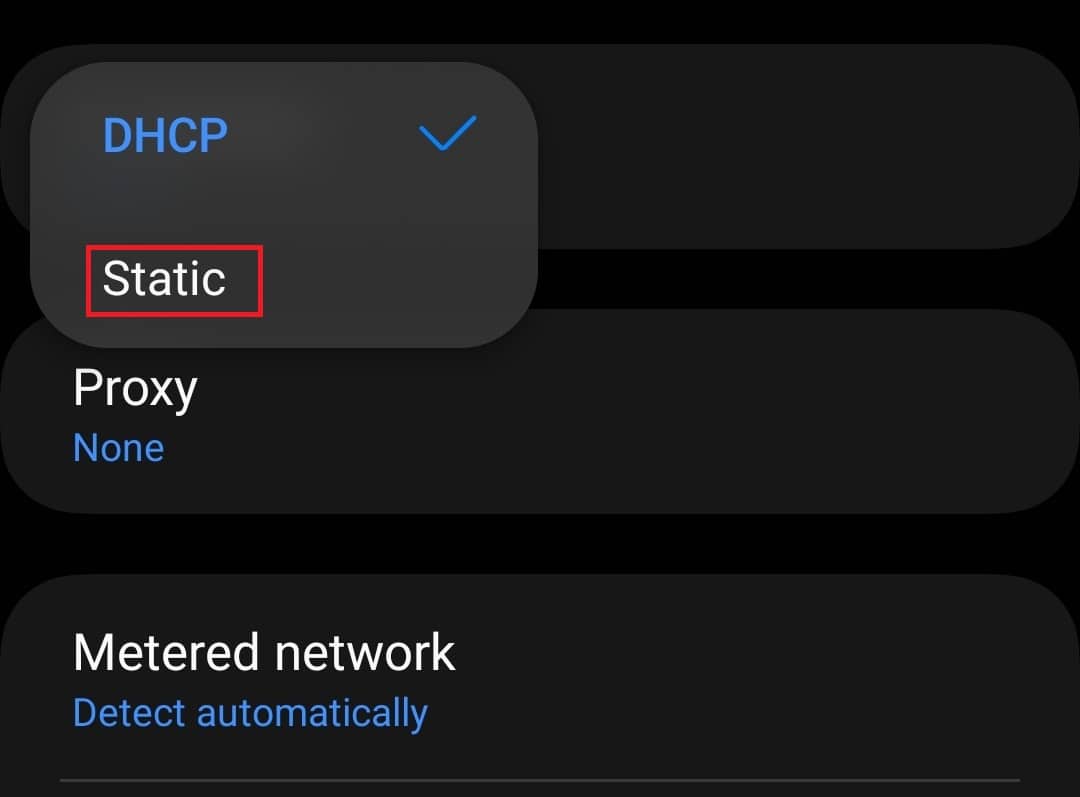
- From the available options, select Static.
- Now, type DNS 1 (which will be the preferred DNS) and DNS 2 (which will be the alternative DNS).
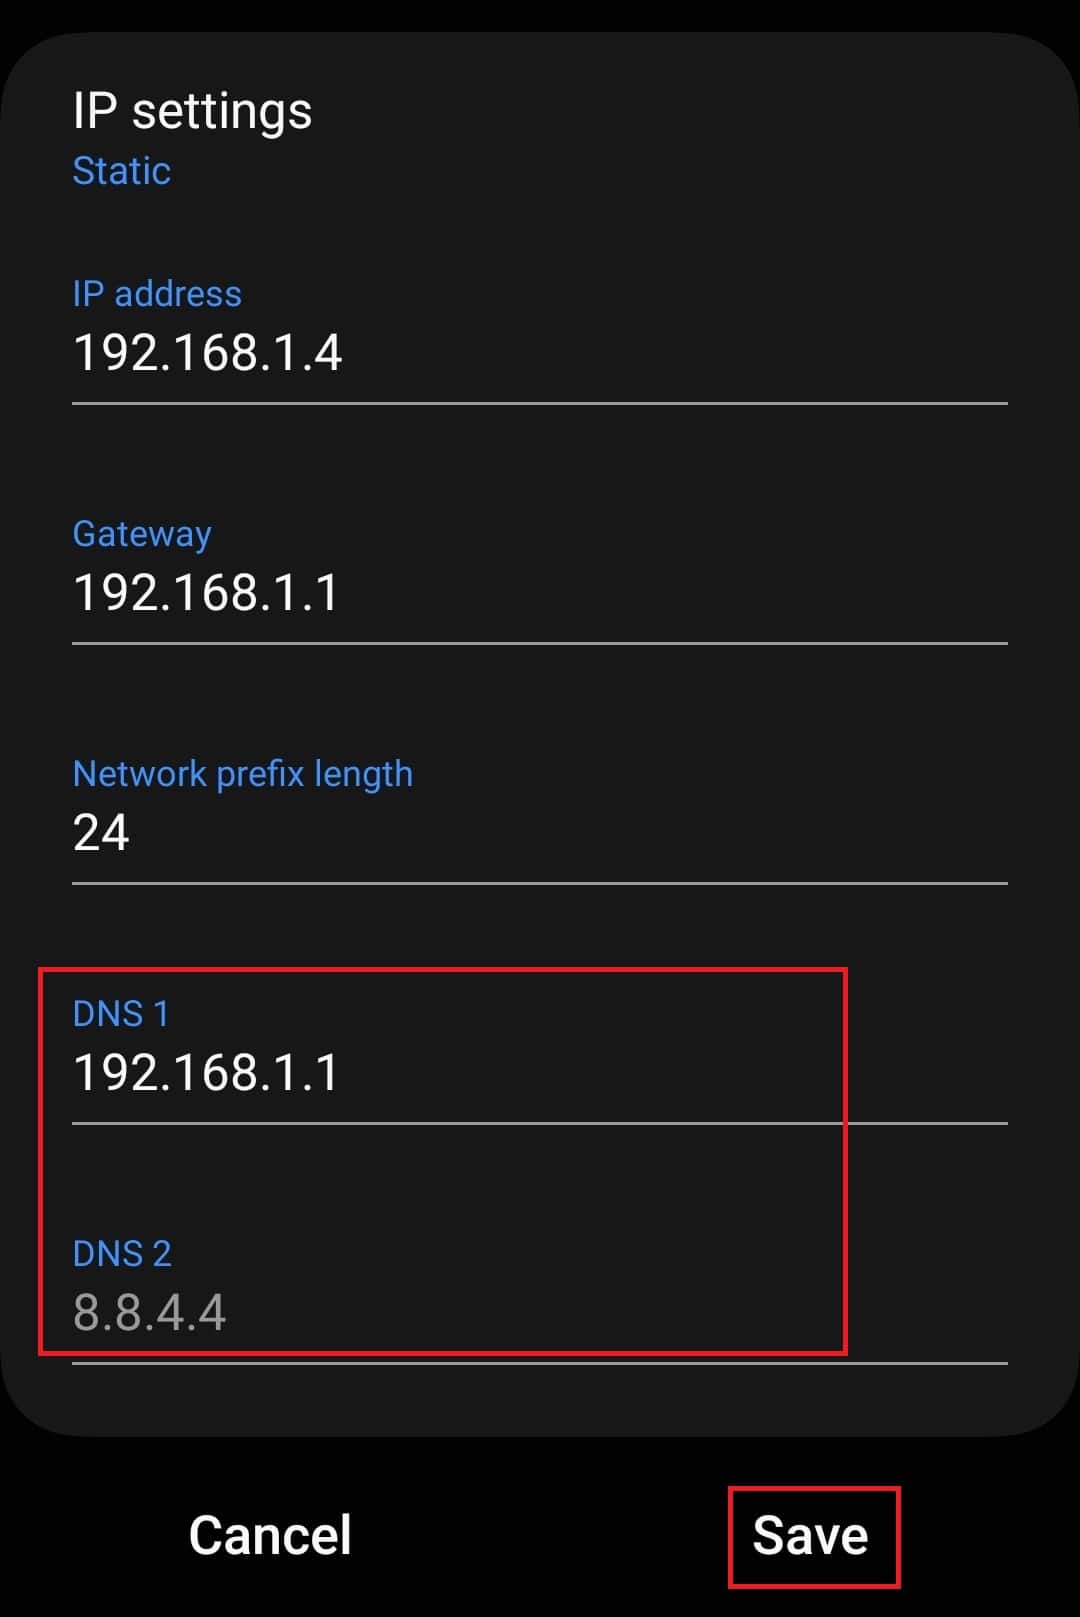
- Tap on the Save button to save the changes.
Note- Above mentioned steps are for Samsung tablets and phones and may vary for other Android device manufacturers.
Change DNS Server on iOS/iPadOS
If you have an iPhone or iPad and want to change the DNS server on it, then you can follow the steps given below-
- Head to the Settings menu.
- Here, tap on the WiFi.
- Next, tap on the i button next to the Wi-Fi network whose DNS you want to change.
- Tap on the Configure DNS option and then tap on Add Server.
- In the given space, type the DNS server address and tap Save.
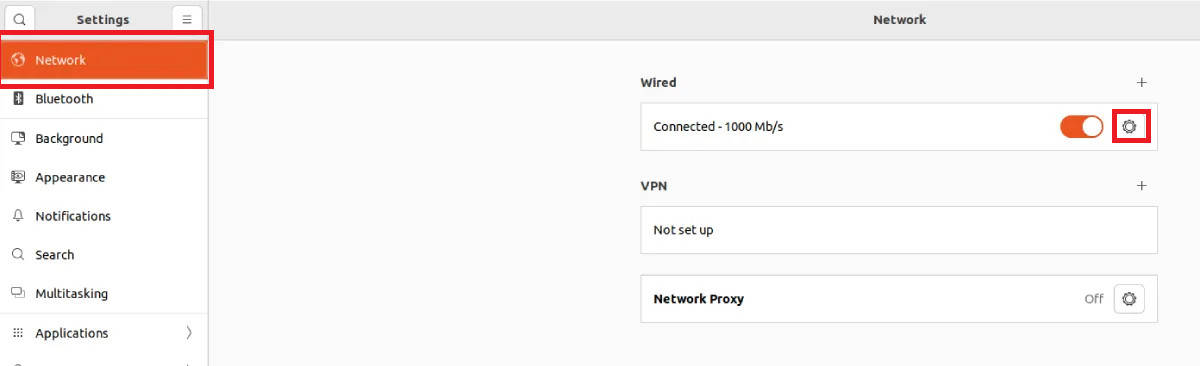
Change DNS Server on Ubuntu
Ubuntu users can follow the steps mentioned below to change the DNS server for a particular network-
- Open the Settings app on the Ubuntu.
- Now, click on the Network option on the left sidebar.
- Click on the Gear icon next to the network whose DNS server you want to change.
- Now, click on the IPv4 tab to change the IPv4 address or click on IPv6 to change the IPv6 address.
- Select Manual, and turn off the Automatic toggle next to DNS.
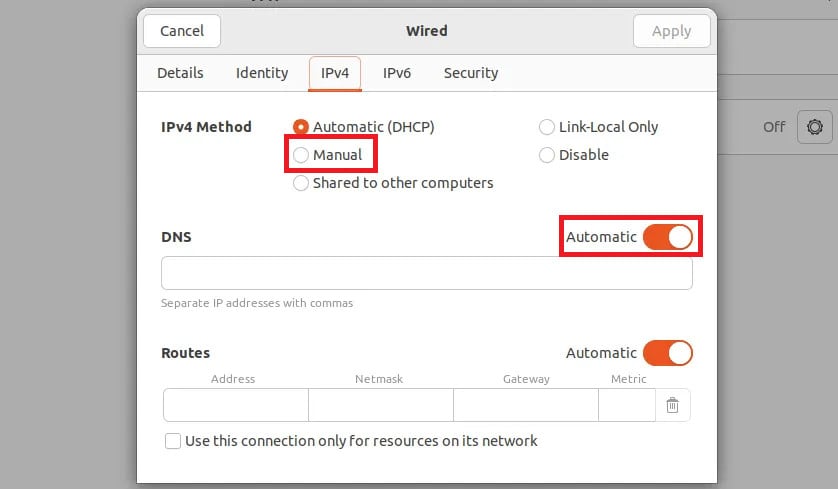
- Enter the IP address of the DNS server in the given field, and click Apply to save the changes.
Bottom Line
The above article discusses how to change the DNS server on Windows 10/11, macOS, Android, and other OS. With the above steps, you can change the DNS server of the particular network. If you connect to another network, then the DNS server settings will not be implemented for that network; you will have to manually change the DNS server for other networks through the steps given above. If you want to revert the DNS server changes, then you can set all the values to Automatic instead of Manual, and it will be done.
READ MORE: