The Domain Name System, or DNS, is a database of all publicly accessible websites and their IP addresses. Windows keeps a local copy of the index in the DNS cache, which is a temporary database. The information from your recent DNS searches is saved in the DNS cache, which your PC can access when you open a website. This allows you to access the website much more quickly. When this DNS cache becomes corrupted, your network connection may experience issues and become slow. Because the data stored in the DNS cache can become inaccurate over time, websites may take longer to load. You can flush the DNS cache in Windows 11 to resolve such issues.
Flushing DNS clears out the DNS cache of all information. It forces the PC to look for the website’s DNS data from the beginning. This resolves your internet problem while also increasing your network speed. In Windows 11, there are several options for flushing the DNS cache.
How to Flush DNS Cache on Windows 11 PC
In this article, we’ll explain how to reset or clear your Windows 11 PC’s DNS cache.
Flushing DNS Cache Using Command Prompt
The very first way to flush DNS cache is by using the Command Prompt. To flush DNS cache using Command Prompt, follow the steps given below-
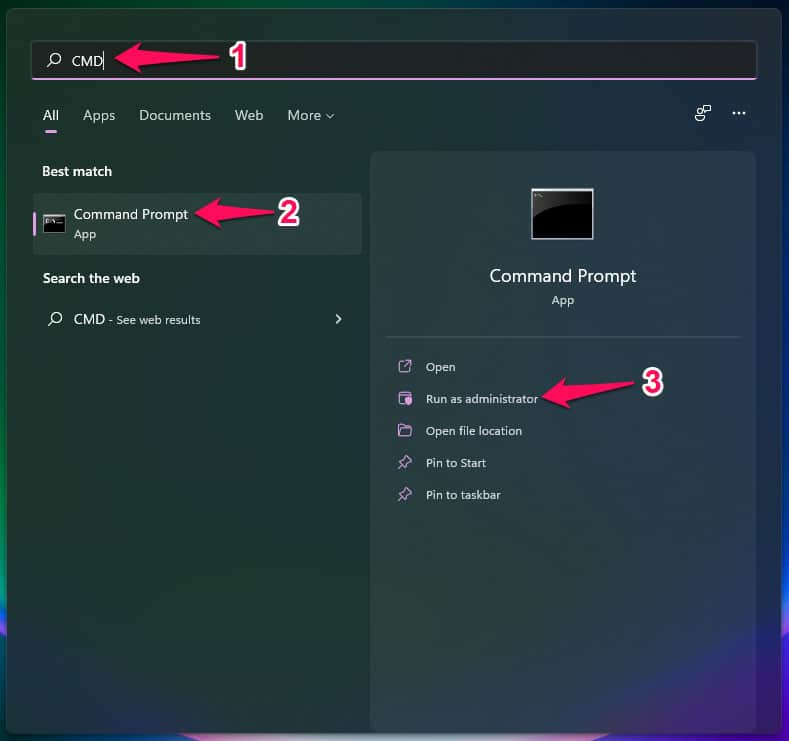
- Press the Windows key on your keyboard to open the Start Menu.

- In the Start Menu, search for CMD. Right-click on the Command Prompt from the Start menu, and then click on Run as administrator.
- In the Command Prompt, type the command ipconfig /flushdns and hit Enter to execute it.
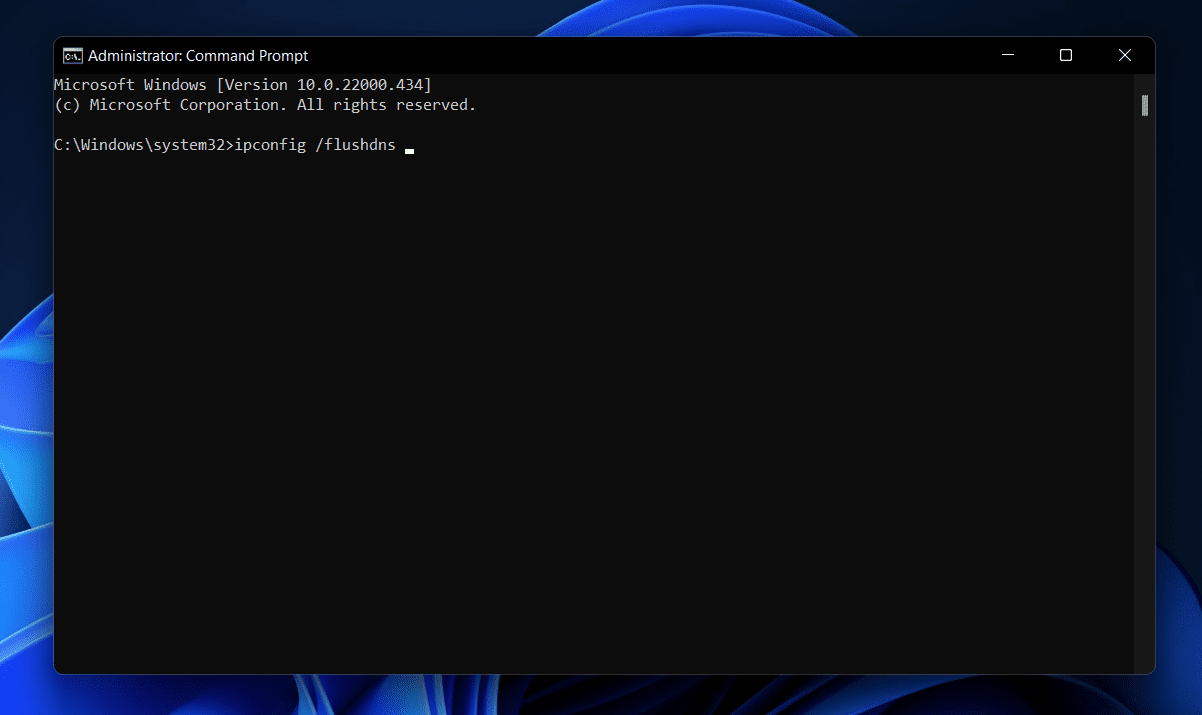
- This will flush the DNS cache in Windows 11 using the Command Prompt.
Reset DNS Cache Using Windows PowerShell
Another way to flush the DNS cache in Windows 11 is by using Windows PowerShell. Given below are the steps to flush DNS cache in Windows 11 by using the Command Prompt-
- Open the Start Menu by pressing the Windows key on your keyboard.
- In the Start Menu, search for Windows PowerShell. Right-click on the Windows PowerShell, and then from the context menu that opens up, click on Run as administrator.

- In the Windows PowerShell, type the command Clear-DnsClientCache and hit Enter to execute it.
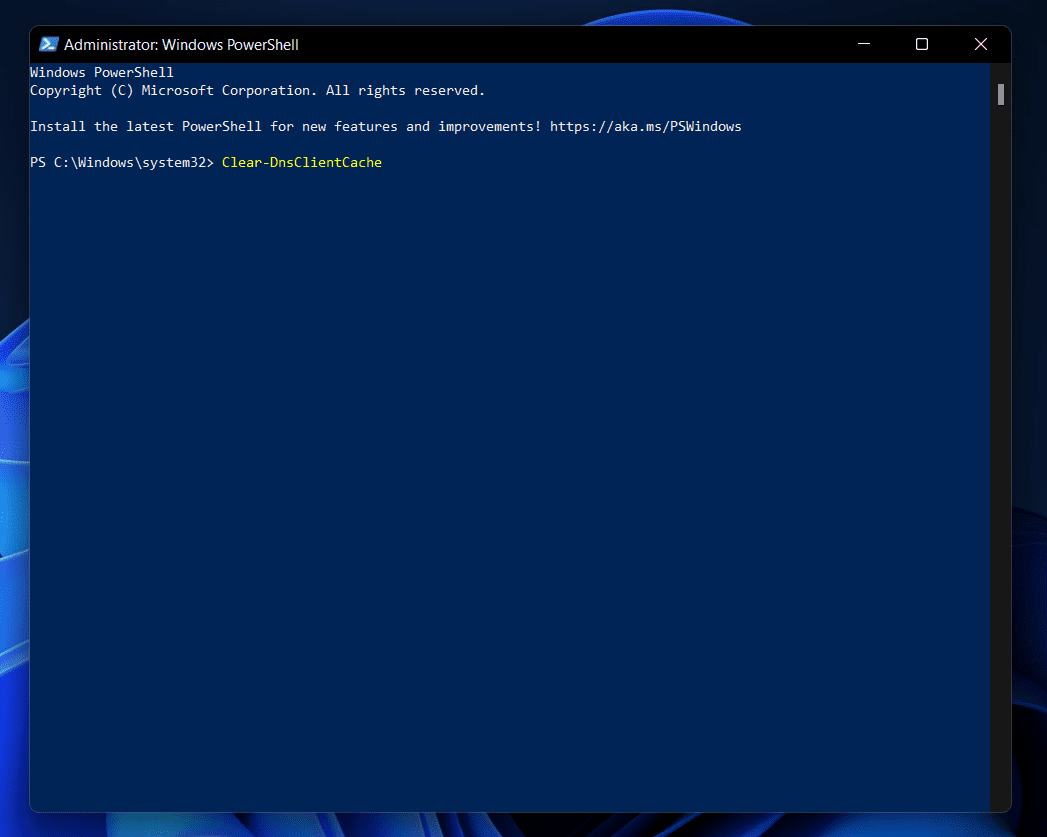
Doing so will flush the DNS cache on your PC, and you will be able to run the internet without any issue.
Clear DNS Cache Using The Run Dialog Box
You can also flush the DNS cache on your PC by using the Run Dialog Box. You can follow the steps given below to flush DNS cache using the Run Dialog Box-
- Press the Windows + R key combo to open the Run Dialog Box.
- In the Run Dialog Box, type the command ipconfig /flushdns and then click on OK or hit Enter to run the command.
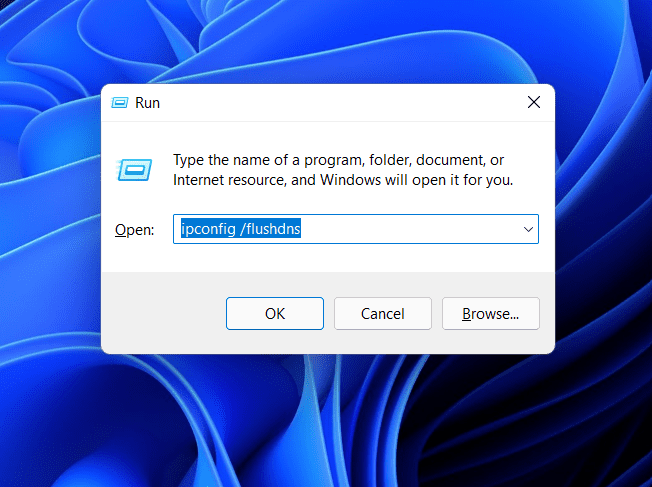
- This will execute the command and flush the DNS cache on your PC.
Editor’s Recommendation:
- Fix The DNS Server Isn’t Responding Error
- Change DNS Server on Windows 10, macOS, Android
- Track Internet Usage On Windows 11
- How To Create Full System Backup in Windows 11
Conclusion
The following are all the methods you can use to clear the Windows PC’s DNS cache. In this article, we’ve covered every method for flushing the Windows PC’s DNS cache. Flushing the DNS cache on Windows 11 is as simple as following the instructions provided in this article.