Domain Name System (DNS) is a naming system for computers and devices connected to the internet or any private network. Why DNS is important, and why do you all know how to change and flush DNS in your Windows 10.
Why should you change DNS?
There are several benefits that you can receive from changing the DNS on your device.
1. You can access the data on the internet, which is blocked in your region.
2. You can filter the content which can be accessed on your device.
3. The protection of your device is increased due to the change in DNS.
4. The internet service can be improved considerably just by changing the DNS.
These are some of the benefits of changing the DNS on your device. Thus, here we are with some of the best methods which you can use to change the DNS on your Windows 10 PC.
ALSO READ: 6 Ways to Fix DS4windows Not Working in Windows 10 Games
How to Change DNS on Windows 10
There are three different methods that you can use to change DNS on your Windows 10. They are as follows.
Method 1: Using the Command Prompt
The steps involved in this method are listed below.
Step 1- Run ‘Command Prompt‘ on your PC as an administrator.
Step 2- Type ‘netsh‘ in the text box and hit Enter. Then, type ‘interface show interface‘ and again press Enter.
Step 3- Now, type the command listed below.
interface ip set dns
name=”ADAPTER-NAME”
source=”static”
address=”X.X.X.X”
Note- Remember to change the ADAPTER-NAME with the name of your network adapter and X.X.X.X with the IP address of the DNS server you wish to use.
ALSO READ: How To Delete Win Log Files In Windows 10 (3-Methods)
Method 2: Via Settings
To change DNS on your Windows 10 via Settings, execute the steps listed below.
Step 1- Launch ‘Settings‘ on your Windows 10 PC.
Step 2- In the Network & Internet section, go to Ethernet or WiFi, depending on your internet connection.
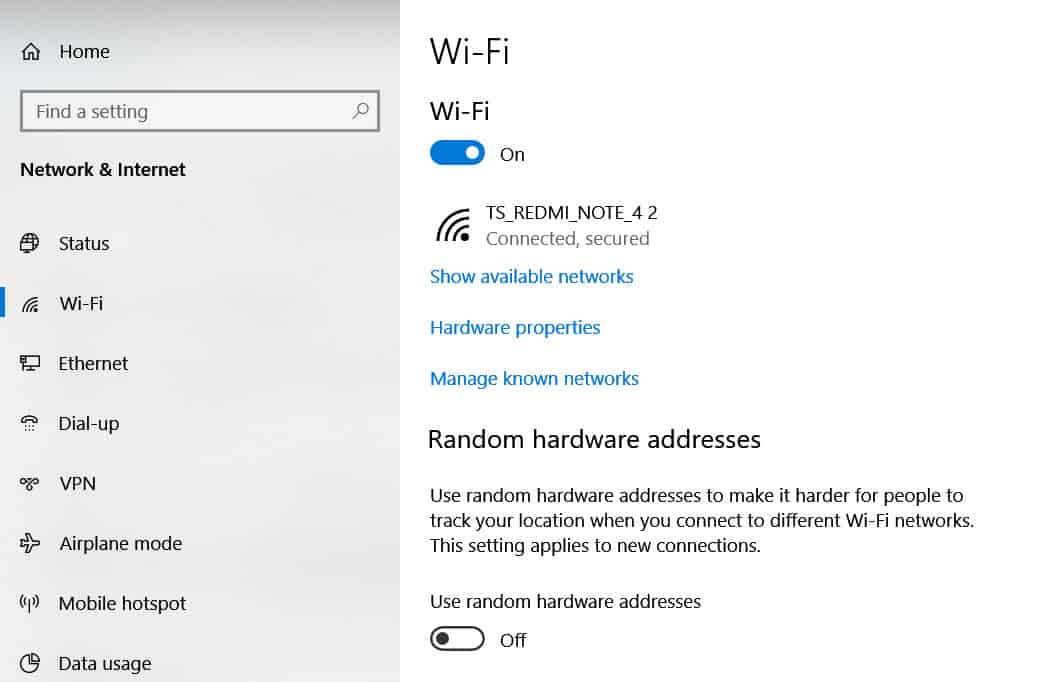
Step 3- Here, in the ‘IP address‘ section, click on the ‘Edit‘ option.

Step 4- Click on the ‘Edit IP address‘ to open the drop-down box. Select ‘Manual‘ from the list and click on the ‘Save‘ option.
Step 5- Enable the IPv4 toggle and enter your preferred DNS and alternate DNS in the dedicated text box.

Step 6- Finally, click on ‘Save‘ to apply the changes you have just made.
Method 3: Through Control Panel
Step 1- From the Control Panel, go to the ‘Network and Sharing Center‘ and click on the ‘Change adapter settings‘ option.
Step 2- Right-Click on the network you are connected to and click on ‘Properties‘ from the drop-down box that appears on your screen.
Step 3- Click on ‘Internet Protocol Version 4 (TCP/IPv4)‘ from the list of items and click on the ‘Properties‘ option.
Step 4- Now, check the ‘Use the following DNS server addresses‘ checkbox and enter your preferred DNS and alternate DNS in the dedicated sections.
Some of the best DNS servers which you can use on your Windows 10 include-
Cloudflare: 1.1.1.1 and 1.0.0.1
Google Public DNS: 8.8.8.8 and 8.8.4.4
OpenDNS: 208.67.222.222 and 208.67.220.220
ALSO READ: Yourphone.exe in Windows 10 – Here’s How to Disable/Uninstall it
Conclusion:
These are some of the best methods which you can use to change the DNS on your Windows 10. The methods and the steps involved are are easy to understand and execute.
If you know of any better to change DNS on your Windows 10, then please let us know about it in the comments section below.