With Windows 10 Home, millions of users around the world can access a range of robust features. Although it has some advantages over professional alternatives, it lacks some advanced tools that are indispensable to power users.
There are some tools in Windows 10 Home that are not available, including the Local Users and Groups Management Console (lusrmgr.msc). So, in this guide, we are going to explain some important steps that you can easily use to enable the Local User and Group Management (lusrmgr.msc) Console in Windows 10 Home. Therefore, let’s get started with the guide.
What is Lusrmgr.msc (Local Users and Groups Management)?
This utility manages local users and groups on a Windows system using the Local User and Group Management (lusrmgr.msc) console.
Windows Console is a universal console included in Windows XP to Windows 10. User and group accounts can be created, deleted, or modified, and users can be added or removed from groups.
As an alternative, you can use lusrmgr. Moreover, you can edit the properties of a user account, such as its password policy and login script, through the Microsoft Control Panel.
Why is lusrmgr.msc Not Available in Windows Home Version?
In Windows, lusrmgr.msc is a console tool that manages users and groups with advanced capabilities. This tool, however, is available only for Windows Pro and Windows Enterprise users.
This tool is not available to Windows Home users since most features are unnecessary. As with Group Policy Editor, which is not available for Windows Home users but can be enabled through the User Account Control (UAC) interface.
What are the system requirements for lusrmgr.exe?
To be able to install lusrmgr.exe, you need to have the following system requirements:
- .NET Framework version 4.6 or later
- Using Windows Vista/Windows Server 2008 or above operating system
How to Enable Local User & Group Management in Windows 10?
This feature can only be used in Windows 10 Pro, Education, and Enterprise editions due to its similarity to the Local Group Policy Editor. Currently, lusrmgr.msc cannot be enabled by default in Windows 10 Home.
The only way to manage users and groups is to download the lusrmgr.exe program, which is a third-party program. In addition to running on Windows 10, lusrmgr.msc is a portable application. There is a free version available on GitHub as well.
However, in Windows 10 Home Edition, you can enable the Local User Group and Management Console as follows:
- Go to the GitHub lusrmgr.exe download website.
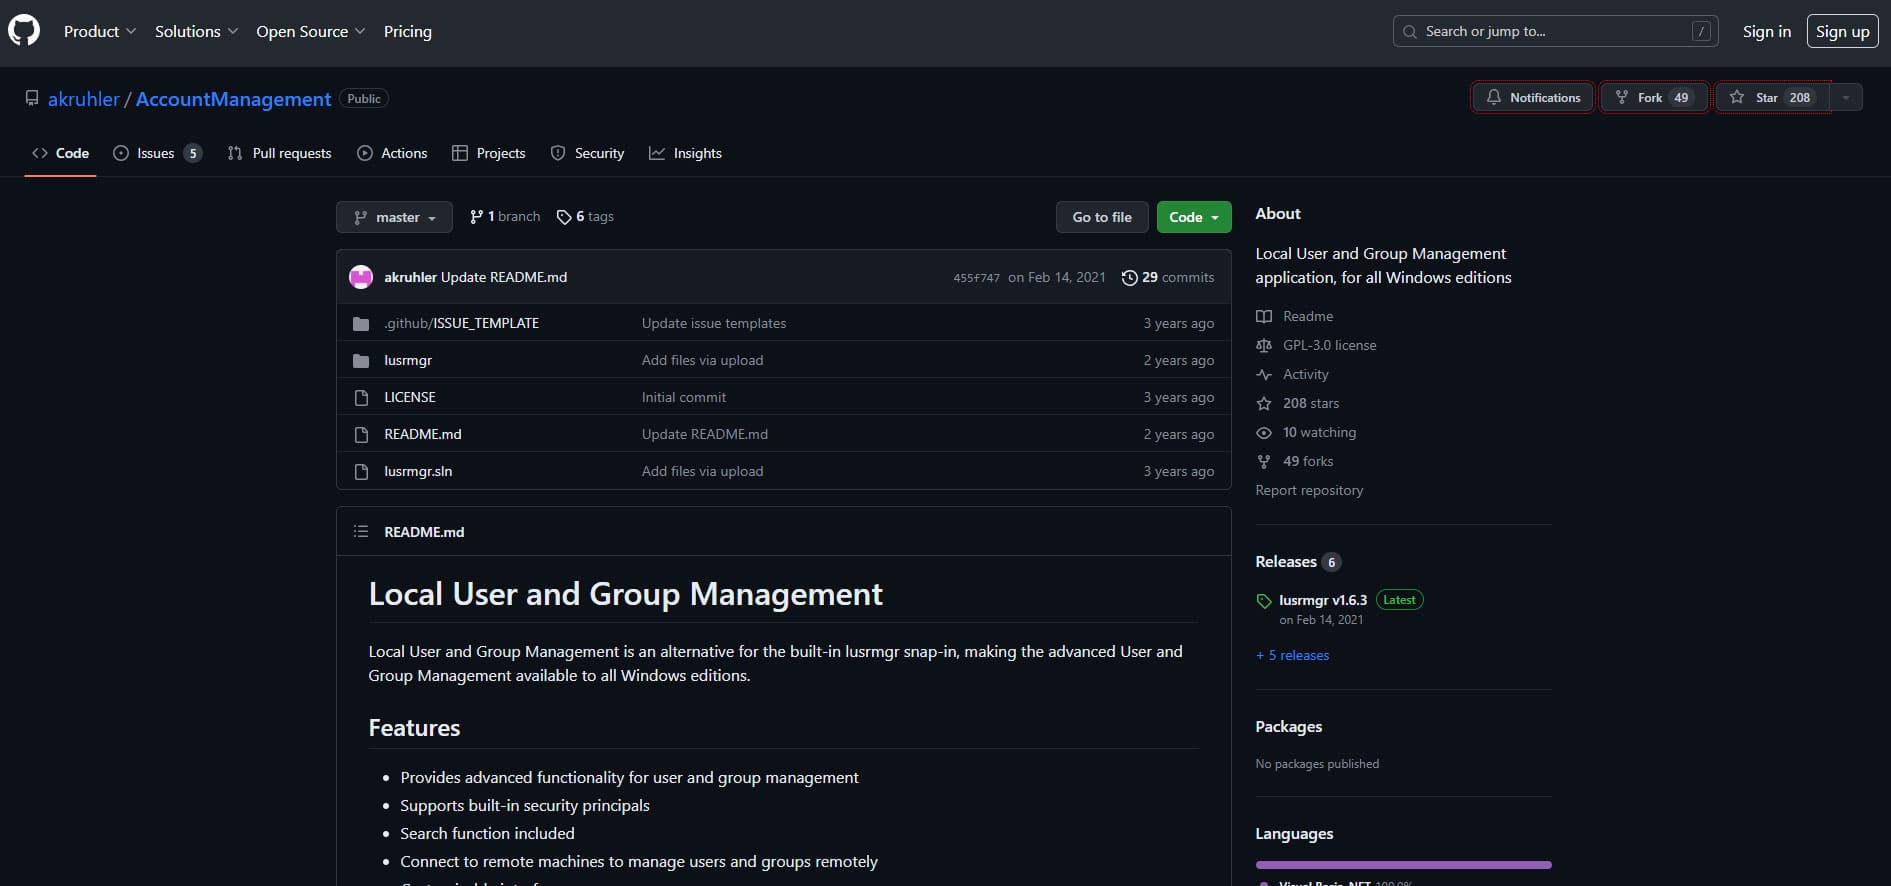
- To download the latest version, scroll down the Code tab and click the Download link.
- To run lusrmgr.msc, navigate to the download location in File Explorer and double-click the file.
- Upon the User Action Control prompt, click Yes to allow the application to make changes.
- In the search bar, type lusrmgr, then click Run as administrator.
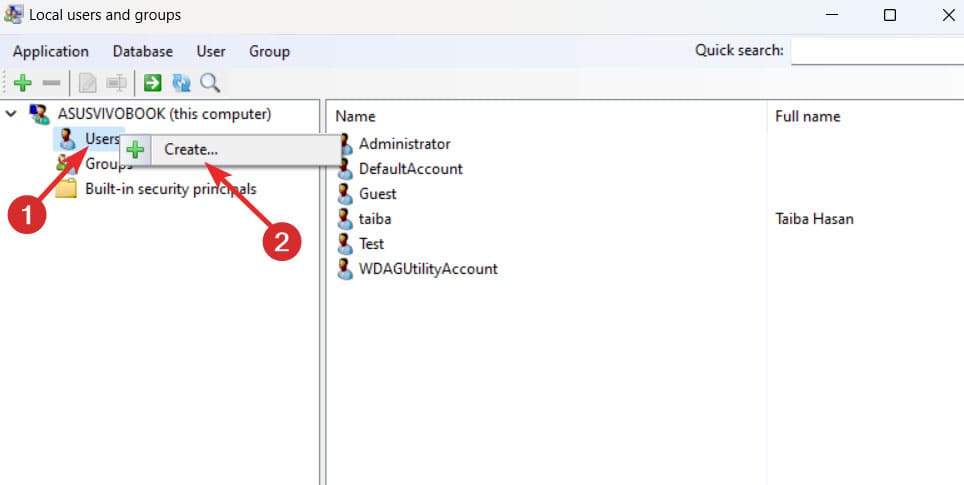
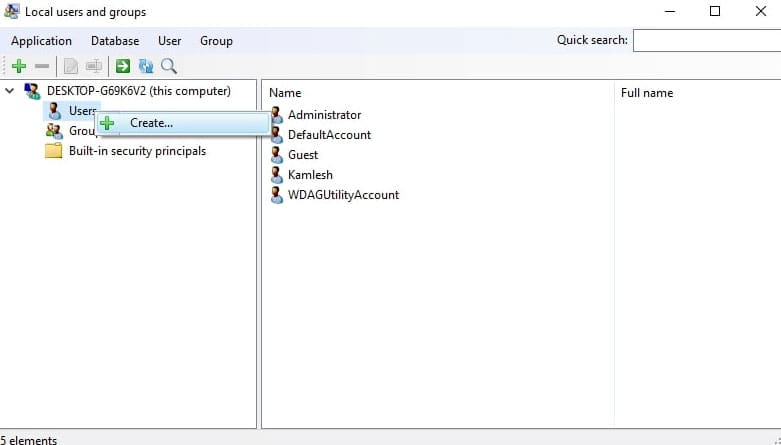
- In the left sidebar, right-click on Users and select Create.
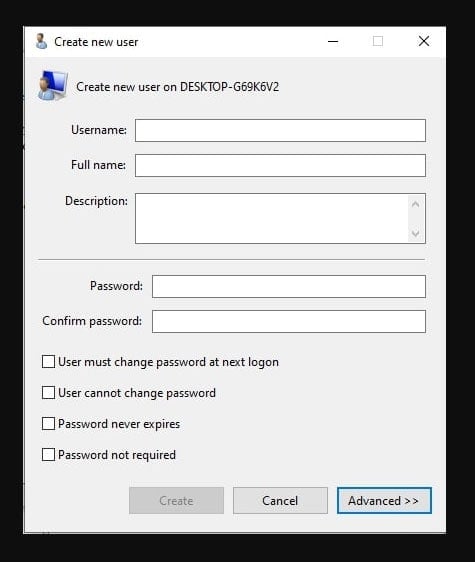
- Then, you can assign your username, set your password, and confirm your password.
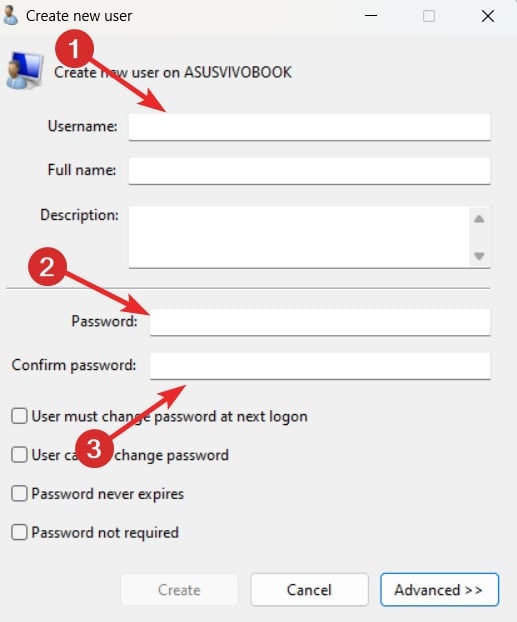
- To configure the account expiration date and the local path, click the Advanced button.
- Finally, in order to create a new user account, click the Create button after filling out the required fields.
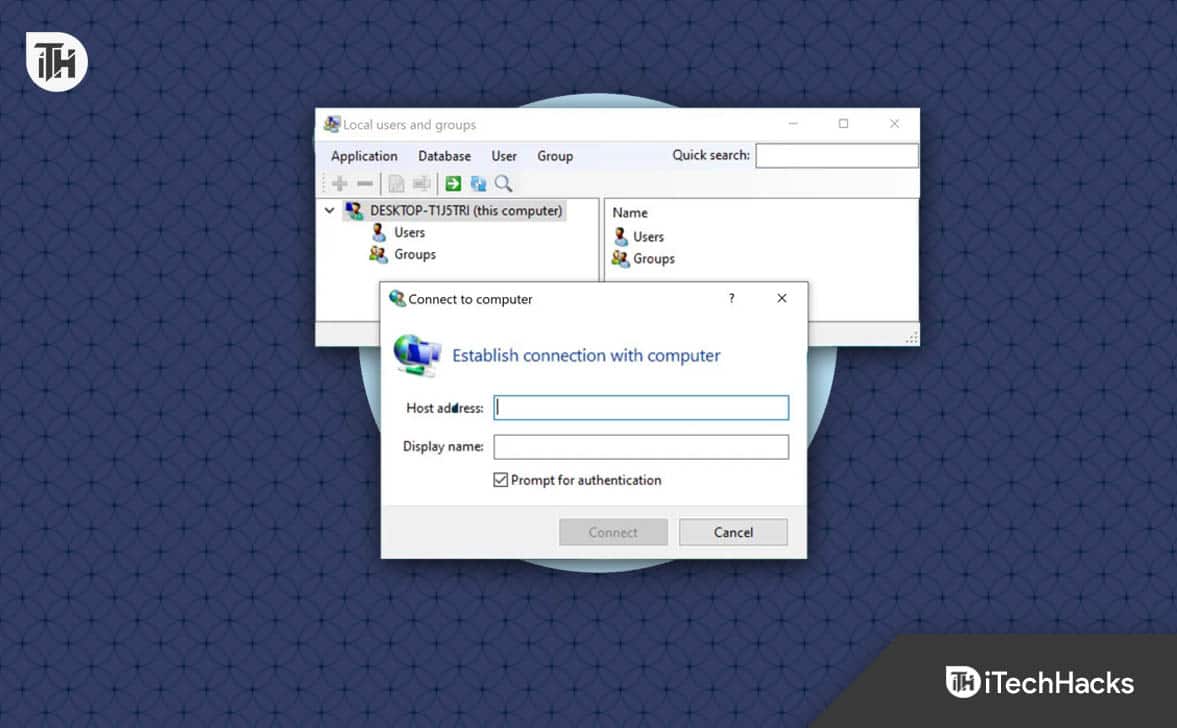
Within the console for Local users and groups, you can create and manage users and groups.
How to Use lusrmgr to Create a New User Account
- To create a user, click the Users menu and select Create.
- Then, click the Create button after filling in the user’s details.
- Using the Advanced button, you can configure your account options, local path, and profile path. To add a new account, click Create.
The existing user account can also be edited, deleted, or renamed, or a password can be added. However, you can also enable the secret administrator account using the Local Users and Groups Management tool.
How to Manage Users in Windows through Settings
It is also possible to manage users and groups straight from settings if you do not wish to install any third-party software.
As far as I am concerned, this method has limited options and flexibility. In the lusrmgr.msc console, you won’t find as many features and options.
Steps to Manage Users in Windows Home:
- To open the Settings, press Windows Key + I.
- Go to Accounts > Family & other users.
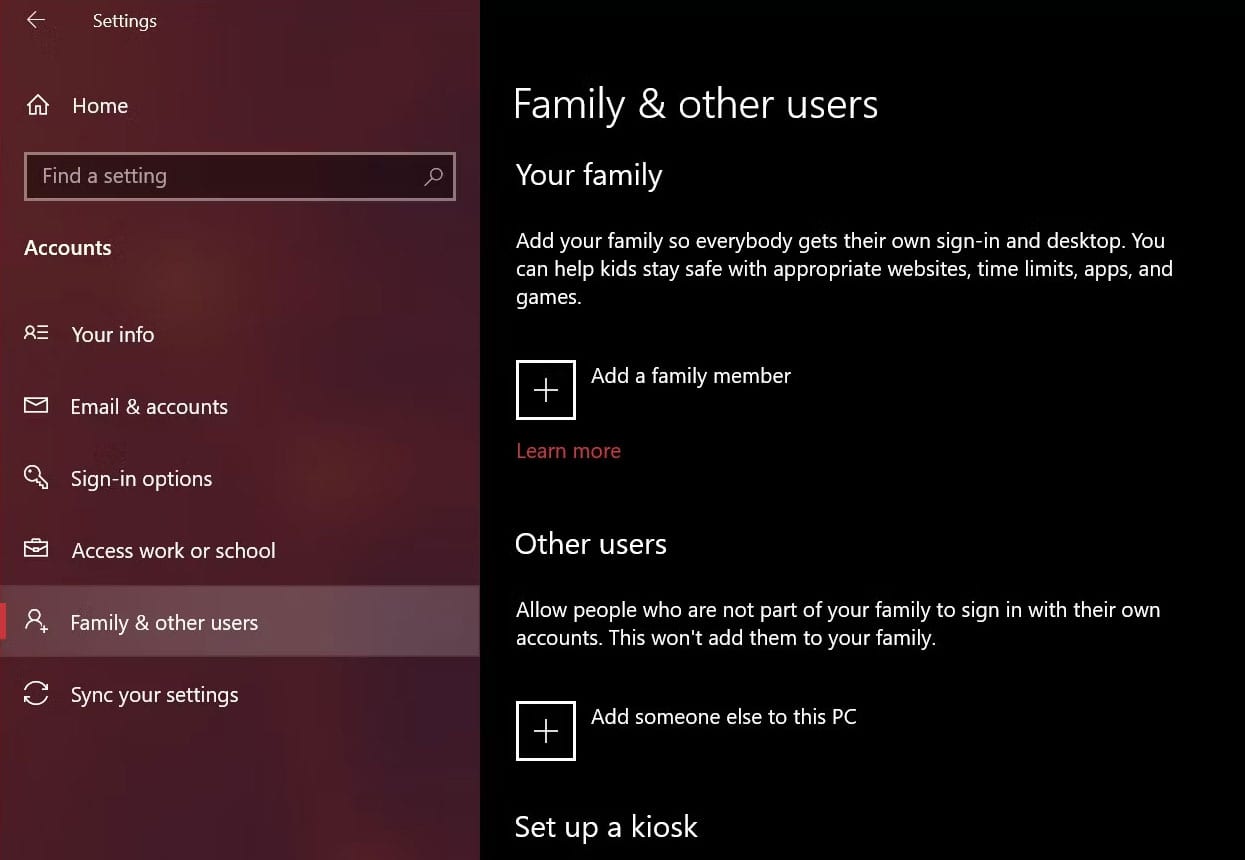
- According to your needs, select either Add a family member or Add someone else to this PC.
- To create a new account, the new user can use their Microsoft ID.
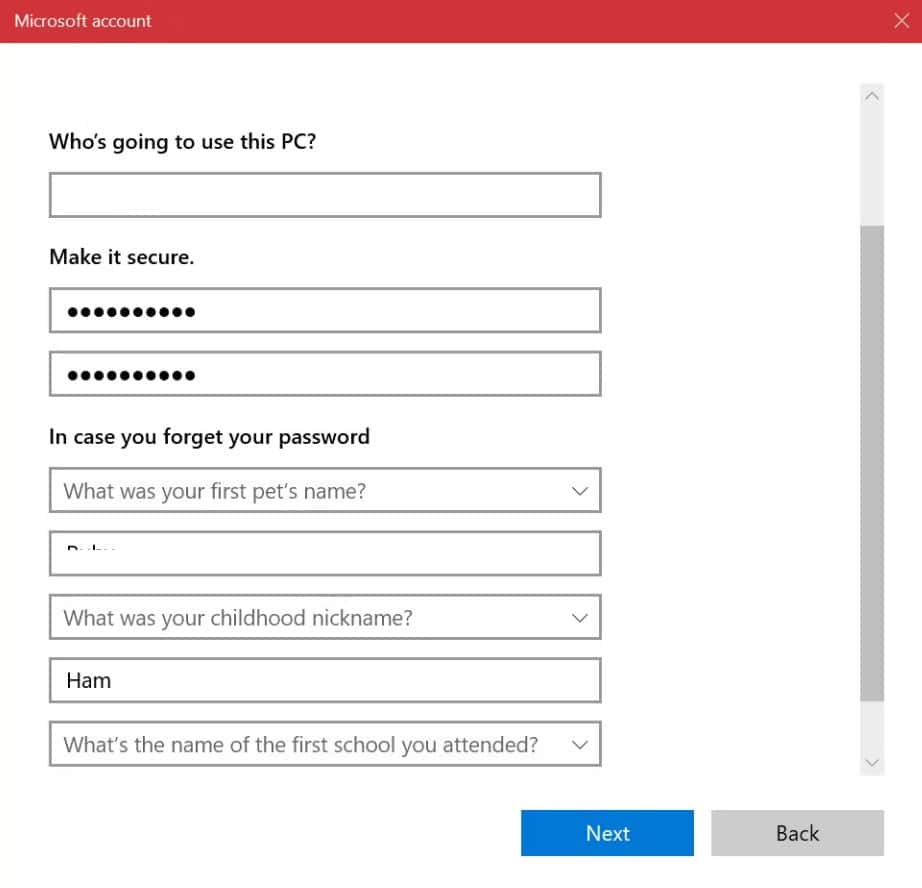
- You can click I don’t have this person’s sign-in information if they don’t have a Microsoft ID.
- Lastly, select Add a user without a Microsoft Account.
There will be a tab for the new users, under which you can change their account type or remove them. Users can be managed through the Control Panel.
- To access control, press Windows Key + R and type control.
- Afterward, click on User Accounts in the Control Panel.
In this section, you can edit the information for all users currently registered with your company.
#1. Changing the Account Name
So, to change your account name, you must perform the steps mentioned below:
- Click on Change Your Account.
- Afterward, tap on Enter New Name.
- Then, press Change Name in order to apply the changes.
#2. Changing Account Type
You can modify your current account type of any user to do so:
- Tap on Change Your Account Type.
- Then, either select the Administrator or Standard account type.
How Do I Enable or Create a Guest Account on Windows?
- Using the right-click menu on Windows, open Command Prompt (Admin).
- Enter the following command:
net user Visitor /add /active:yes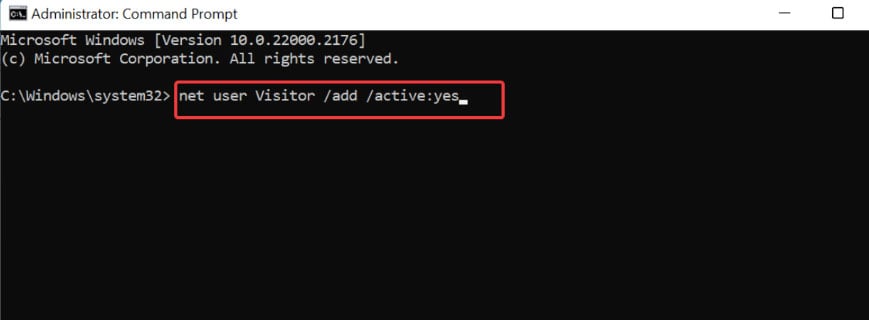
- There is the option to enter a password for the guest account or press enter without entering a password.
- Type the following command to remove this account from the local group:
net localgroup users Visitor /delete
- Last but not least, we will assign this user to the guest group to create a guest account that has restricted access to the system. Enter the following command and press enter:
net localgroup guests Visitor /add
ALSO READ:
- Download KB5026361 Cumulative Update For Windows 10 22H2, 21H2, 20H2 [Patch Tuesday]
- How to Update Drivers In Windows 11 Properly and Safely
- How To Download and Install Safari on Windows 11
- Fix Start PXE Over IPv4 Error Message While Booting in Windows 11
- How to Make Windows 11 Search Faster And More Accurate
- How to Fix Two-Finger Scroll Not Working Issue on Windows 11