Many users of Apple products tend to favor proprietary apps for tasks such as map navigation, listening to music, taking notes, and sending messages. Apple Music is the go-to service for music streaming on devices like iPhones, iPads, and Macs. However, users may encounter occasional issues or limitations when using Apple Music, such as the error message “This song is not currently available in your country or region.”
Apple Music is a proprietary music, audio, and video streaming service developed by Apple Inc. With the help of this service, Apple product users select music to stream to their device on-demand, or they can even listen to existing playlists. Apple Music offers millions of songs across the globe, but some music might not be accessible in several regions due to the restrictions on Apple Music’s content.
It becomes a hurdle, especially whenever you travel a lot in different countries or suddenly one day you find that your playlist songs aren’t able to play due to the not currently available in your country error on your iPhone. Music streaming may vary from country to country depending on the geo-restrictions or availability due to release issues from the publisher.
Fix This Song is Not Available in Your Country or Region on Apple Music
Thankfully, there are several solutions available to solve this issue, and this article will provide you with detailed instructions. If you’re interested in understanding why this error occurs, it’s important to note that certain music might not be licensed for the country or region you’re currently in.

In addition, the outdated Apple Music application, an outdated iOS software version, a temporary system glitch on the device, Apple Music settings on the application, VPN blocking issues, and more can be another reason for this.
1. Force Restart Your iPhone
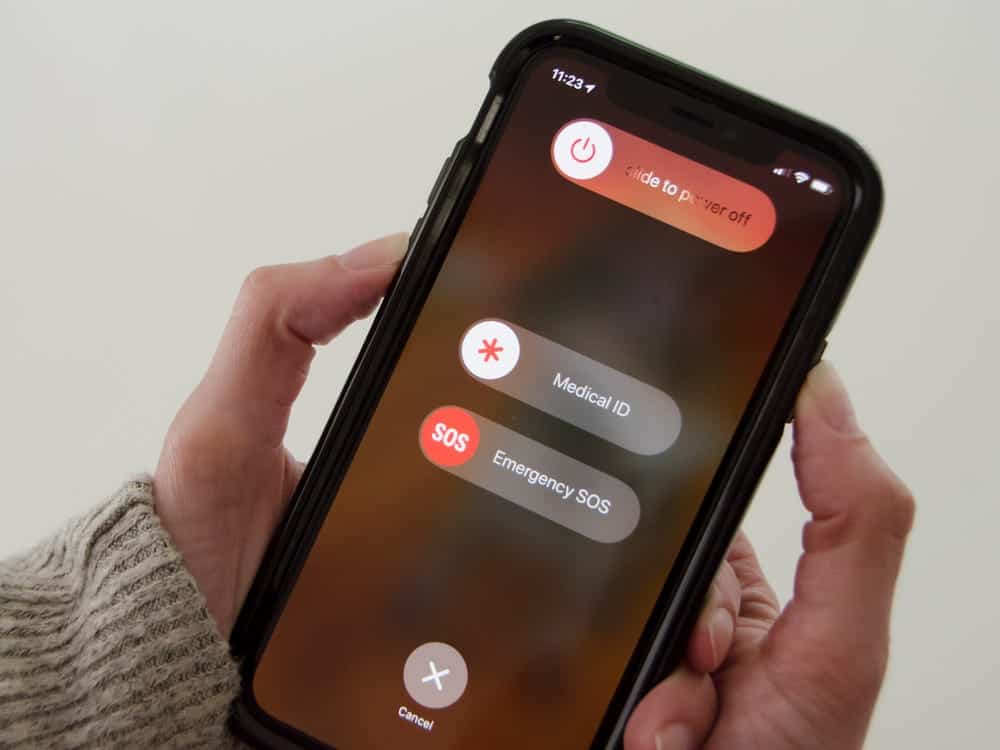
Force reboot of the iPhone mostly works great if the iPhone isn’t responding or somehow there is an issue with the system. It’s one of the easiest methods for your iPhone to clear potential issues. Make sure to perform the following steps quickly and in sequence.
- Press and quickly release the Volume Up button.
- Press and quickly release the Volume Down button.
- Then long-press the Side button (Power key) for a few seconds.
- When the Apple boot logo appears on the screen, release the Side button too.
- Voila! Your iPhone has been force rebooted.
2. Enable Airplane Mode and Disable Again
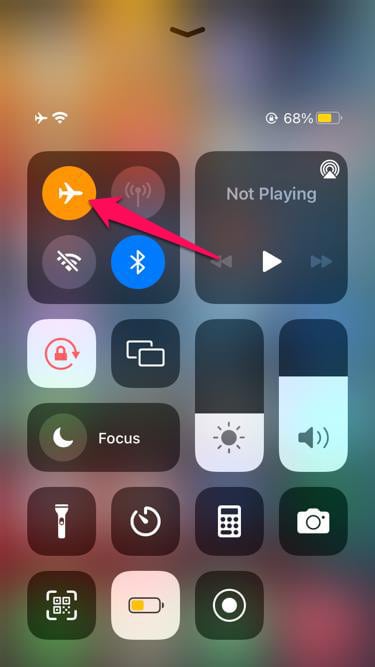
You can use Airplane Mode to turn off the wireless features on your device while you’re flying in an airplane which is a handy feature. But it also helps you to fix some temporary networking issues quite easily. So, it’s good to try this method.
- Open Control Center on your iPhone.
- Then tap on the Airplane Mode button to turn it on.
- Wait for a few seconds, and then turn it off.
3. Check the Network Connectivity Status

You can check the network connectivity status of whatever you use, such as Wi-Fi or Mobile Data. Unless you’re using an active internet connection, it’ll be hard to play Apple Music efficiently. Try visiting a random website in Safari or any social media app to check whether the internet is working. If you’re using mobile data, switch to a Wi-Fi connection.
4. Check Apple Music Server Status
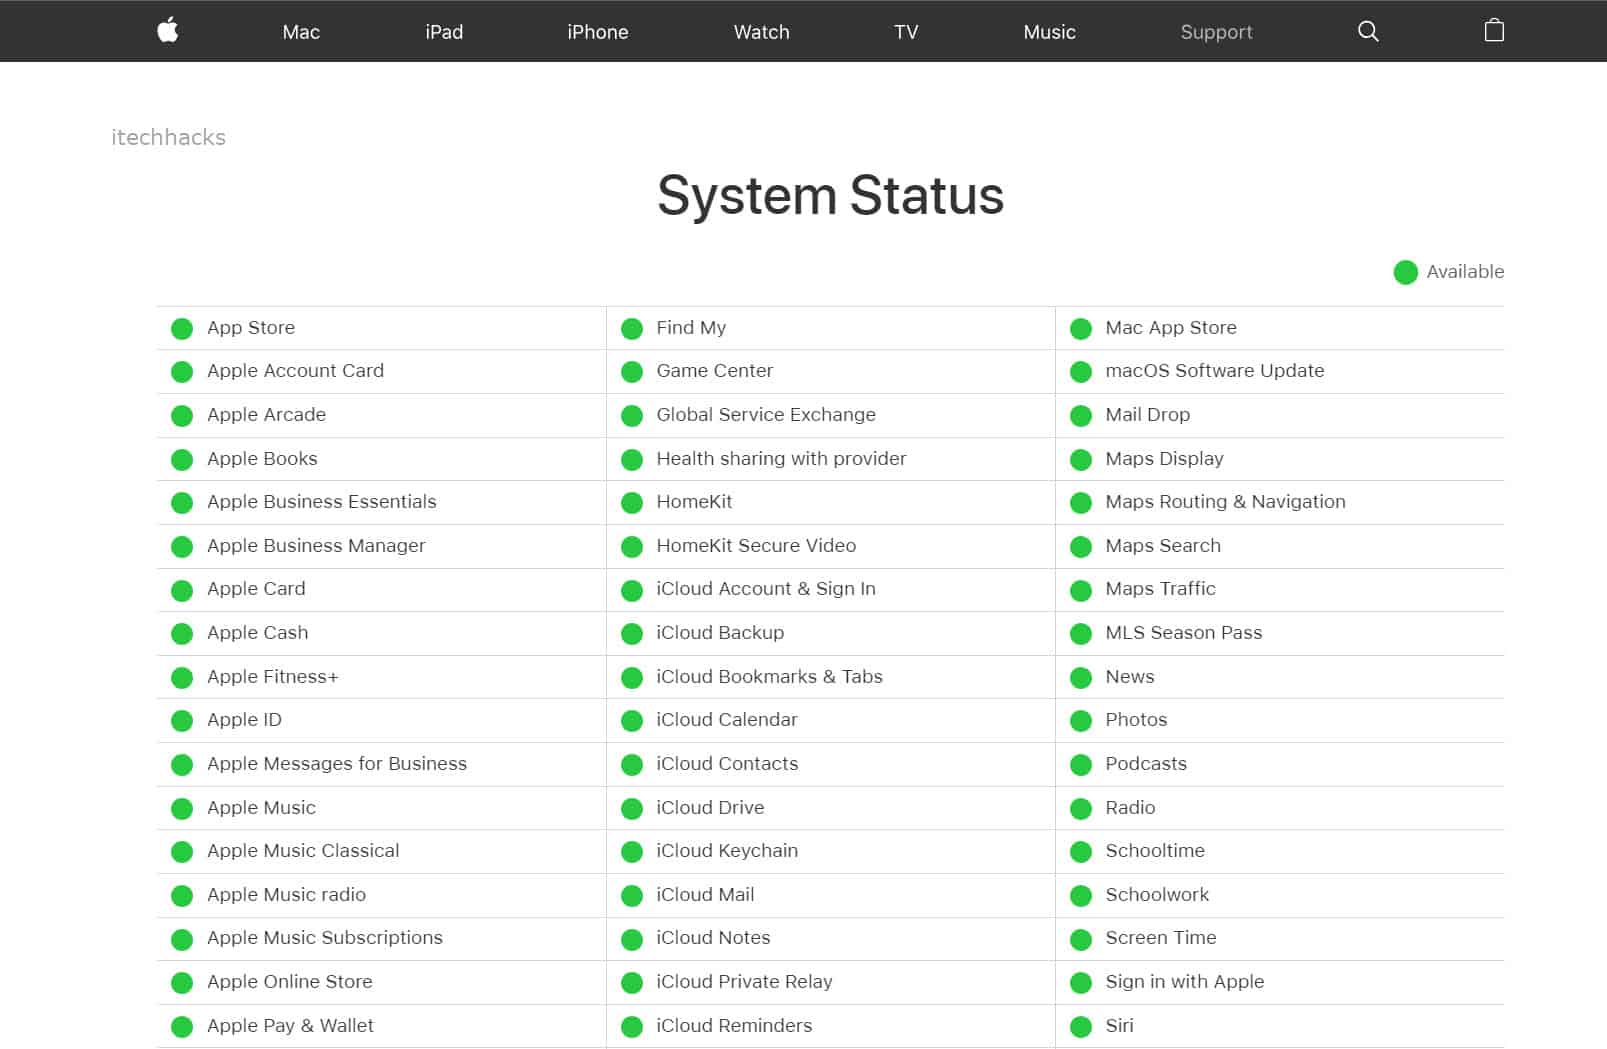
Apple Inc has a wide range of services online worldwide which are basically synced or connected to servers. Sometimes any technical issue with the Apple servers or system might be problematic to you. So, it’s better to check the Apple System Status here, especially the Apple Music server status, to ensure there is no issue you’re facing.
If there is a downtime present in the Apple online services then a yellow or orange indicator will be shown next to the problematic service (in this case, Apple Music). In that case, you’ll need to wait further to check for the issue. Otherwise, head over to the next solution.
5. Set the Correct Country or Region
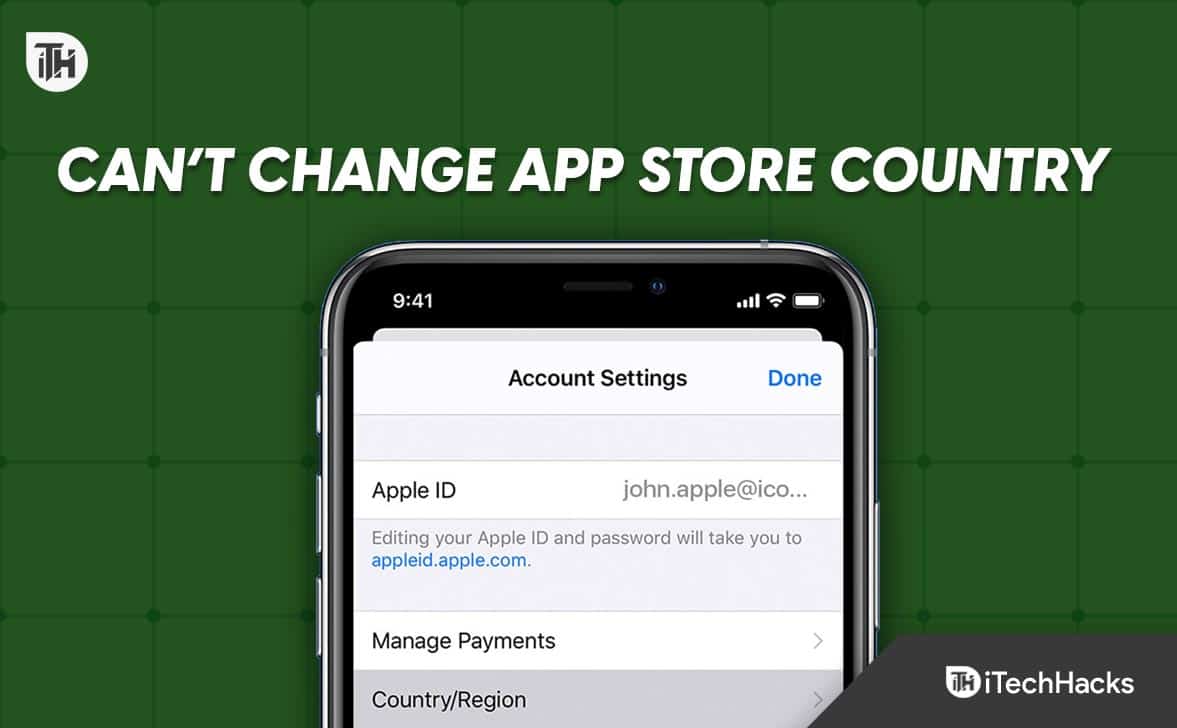
Try changing the country or region on your iPhone or iPad by following the steps below to ensure there is no issue with the incorrect region. Even if you’ve not changed the region, try checking the correct country manually.
Using iPhone or iPad:
- Go to the Settings app on your iPhone or iPad.
- Tap on your name then tap on Media & Purchases.
- Tap on View Account and you might be asked to sign in.
- Next, tap on Country/Region and then tap on Change Country or Region.
- Tap on your new country or region.
- Then review the Terms & Conditions.
- Tap on Agree in the upper-right corner.
- Now, tap on Agree again to confirm.
- Select a payment method and enter your new payment details & billing address.
- Then tap on Next and you must enter a valid payment method for your new country or region.
Using Computer:
- Open the Apple Music app or iTunes.
- From the menu bar at the top of the screen, click on Account.
- Then click on View My Account or Account Settings.
- Sign in with your Apple ID and click on Change Country or Region from the Account Information page.
- Now, select your new country or region.
- Review the Terms & Conditions then click on Agree.
- Click on Agree again to confirm.
- Enter your new payment information and billing address then click on Continue.
Via Online:
- Go to appleid.apple.com and make sure to sign in to your account.
- Select Personal Information and choose Country/Region.
- Follow the onscreen instructions and enter a valid payment method for your new country or region.
6. Set the Correct Date and Time

You can use the date and time on your iPhone that is mostly correct by default, depending on which country and timezone you’ve selected. However, sometimes the incorrect date and time on the iPhone can cause several issues with the software update, streaming, and more. Make sure to follow the steps below to do so:
- Go to the Settings menu on your iPhone.
- Head over to General > Select Date & Time.
- Turn on any of the following as per your preference:
- Set Automatically: iPhone gets the correct time over the network and updates it for your time zone. Some networks don’t support network time, so in some countries or regions, iPhone may not be able to automatically determine the local time.
- 24-Hour Time: (not available in all countries or regions) iPhone displays the hours from 0 to 23.
- You can turn off the Set Automatically option and then change the date and time displayed to change the default date and time.
- Once done, make sure to turn it on again.
7. Check for iOS Updates
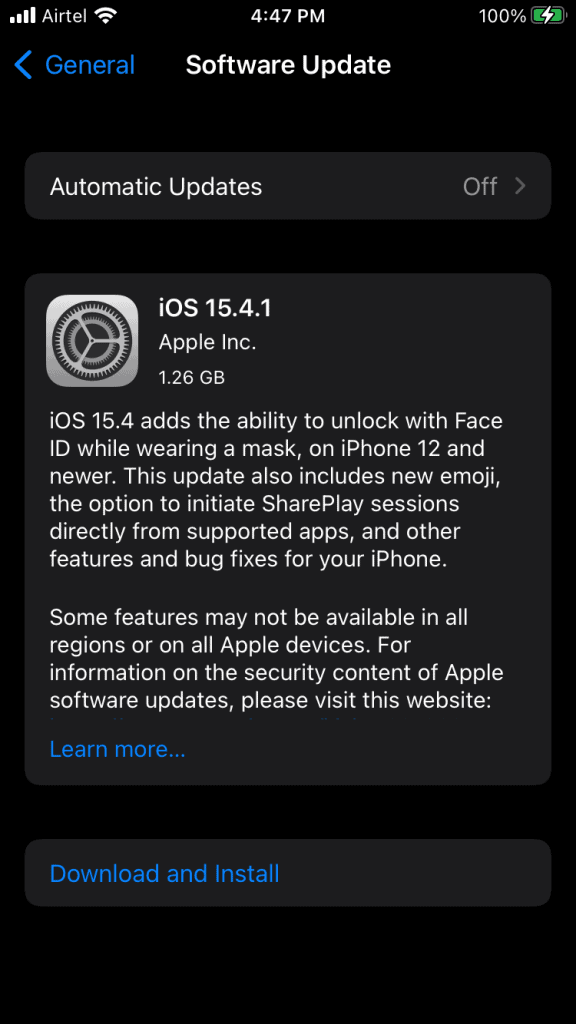
If you didn’t turn on automatic updates on your iPhone while setting up for the first time, check for iOS updates manually by following the steps below.
- Go to the Settings app on your handset.
- Tap on General and select Software Update.
- If the update is available, Download and Install it.
- Make sure to select Automatic Updates.
- Turn on the Download iOS Updates and Install iOS Updates option.
8. Update the Apple Music Application
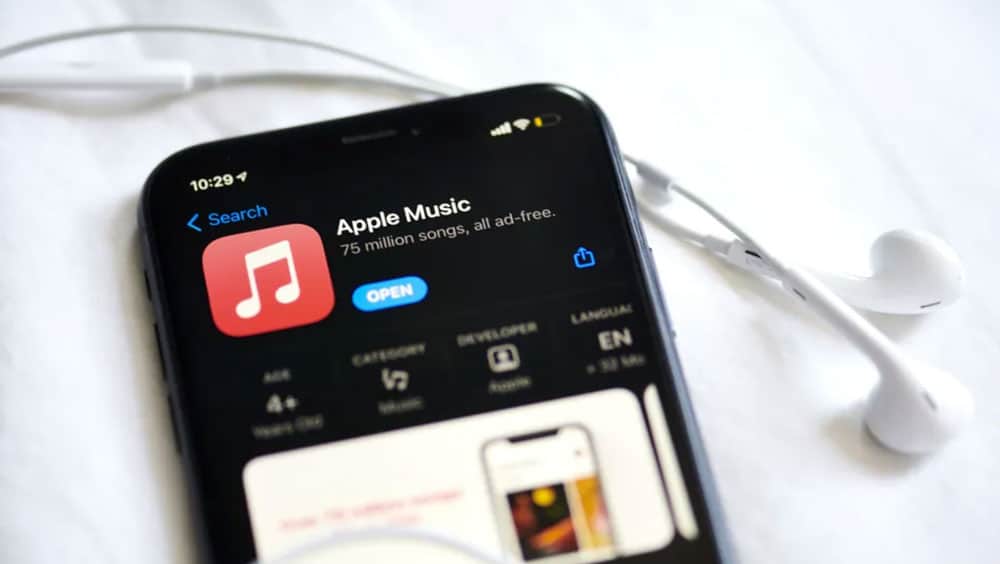
It’s basically one of the common steps for you to perform before jumping into other solutions because sometimes an outdated Apple Music application on the iPhone can bother you a lot. You should follow the steps below to update the app manually.
- Open the App Store application on your iPhone.
- Tap on the search icon and search for Apple Music. [You can directly visit here]
- Check if Apple Music has any pending updates or not.
- If yes, just tap on Update.
9. Reset the System Warning for Apple Music
Sometimes resetting the System Warning on the Apple Music app can also help in resolving any error. It mostly clears outdated or corrupted data that may interfere with the app’s functionality. After doing this, your Apple Music system won’t show you such a notice. To do that:
- Open the Apple Music app on your Mac using the same Apple ID.
- From the Finder menu, click on Music.
- Click on Settings and select Advanced.
- Then click on Reset Warnings and hit OK to save changes.
10. Stop Using VPN
Are you still facing the same issue? Well, you can stop using VPN or Proxy on your iPhone as well as networking devices to avoid geo-restricted music playback. If your device has correctly configured the date, time and region, you don’t need to use a VPN.
11. Sync iCloud Music Library
You’ll need to verify the music library whether anything has been affected or not. If the iCloud music library doesn’t get synced properly then you may encounter This song is not currently available in your country or region Error on Apple Music. To sync it:
- Open the Settings menu and select Music.
- Turn on the Sync Library toggle.
- If the option is already enabled, make sure to turn it off & wait for a few minutes.
- Then turn it on again to start syncing your Apple Music Library.
Please Note: Disabling or Re-enabling the Sync Library option will delete all downloaded songs from your device.
12. Sign Out of iTunes Store and Sign Back In

Sometimes region-setting issues can be crucial if you haven’t actually changed the country by moving the location. It can happen if you find a link on the web that basically points to an app or a media item in iTunes Store from a different country. Signing out of the iTunes Store and signing in again to get the iTunes Store region to match the region using the same Apple ID will be useful.
- Go to the Settings app and hit Account.
- Select Media & Purchases then go to View Account.
- Please select the appropriate Country/Region and confirm that it is the correct one for your desired location.
- Under the Media & Purchases section, sign out of the account and then sign in again.
If you are still encountering the error message “song is currently not available in your region,” please feel free to leave a comment below.
ALSO READ:
- How to Stop Apple Music from Automatically Playing
- How to Fix Receiptify Not Working With Apple Music
- How to Find Apple Music Replay
- Get Apple Music Premium Free for Lifetime iOS
- How To Listen to Apple Music on Roku
- How To Cancel Apple Free Music Trial
- Activate Apple at activate.apple.com TV Enter Code